Original Link: https://www.anandtech.com/show/4485/back-to-the-mac-os-x-107-lion-review
Back to the Mac: OS X 10.7 Lion Review
by Andrew Cunningham, Kristian Vättö & Anand Lal Shimpi on July 20, 2011 8:30 AM ESTApple hasn't exactly paid a ton of attention to Mac OS X since the iPhone came out. There, I said it.
This was obvious even in the lead-up to Leopard in 2007, when Apple delayed that OS's release from a spring timeframe to October so that they could get the iPhone out the door. Since then, we've gotten Snow Leopard (a "no new features" release that did a lot to optimize the platform at the expense of aging PowerPC Macs) and a long string of point updates that have done plenty to polish the OS but not much to advance it. Using OS X today is fundamentally much the same as it was four years ago, though we're doing it on hardware that's four years faster.
Lion, originally unveiled in October of 2010, is Apple's attempt to get "back to the Mac," which when translated from Apple into English means that the company wanted to port some ideas and some functionality from iOS into OS X, which parallels iOS's journey from a touch-driven iPod interface to an increasingly OS X-flavored standalone OS. With Lion, Apple wants to do for its Mac software what it did for its Mac hardware with the MacBook Air - bring concepts people like in tablets to full-featured computers.
One of our goals with a Lion review, then, is to separate the actual useful features from the fluff - what has OS X borrowed from iOS, and does it really improve and make sense for the platform? What functionality feels grafted-on, and what feels like it's been missing from the platform for years?
Another important goal will be to determine the direction in which Lion moves the platform, because new OS X releases tend to be messages just as much as operating systems: Leopard, with its two-and-a-half-year development cycle, told people that OS X's fast-paced, sometimes chaotic early phase was officially over. Snow Leopard told PowerPC users to get with the times or get off the train (or, to put it positively, that Intel was the future and that developers needed to take fuller advantage of the architecture's strengths).
So what is Lion trying to tell us? Read on and find out.
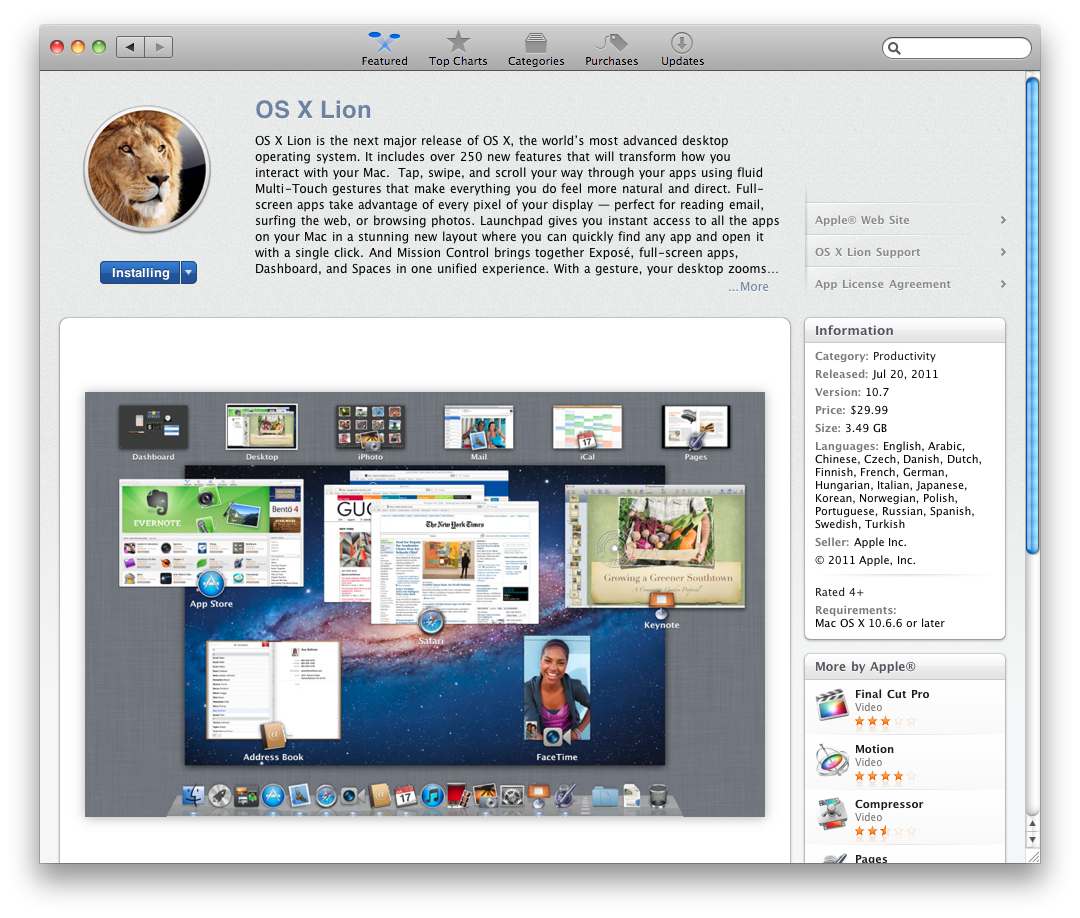
Lion is, as has been well-publicized, not being offered in stores on any install media – to emphasize all of the shiny new imported-from-iOS features, users have to download and install it from the Mac App Store. That said, Lion will be eventually also be available on a USB drive for $69 if you still want a physical copy or don't want to back the installer image up to one yourself.
Annoyances aside, I do think the move away from physical media is the right one for Apple to make – it reduces cost, it enables them to drop optical disk drives from more of their computers going forward, and it brings greater parity to the OS X and iOS install processes, one of many steps that Lion takes toward the potential merging of the two operating systems.
For those of you who are attached to an install disk for one reason or another, accessing the .DMG file within the Lion installer and burning your own DVD is fairly trivial for even a moderately technical user. The installer, like other App Store downloads, is dropped in your Applications folder. Right-click (or CTRL-clicking, depending on your setup) the installer, click Show Package Contents, go into the Contents folder, then the SharedSupport folder, and burn the .dmg file you find here to a DVD (or copy it to a USB stick) with Disk Utility.

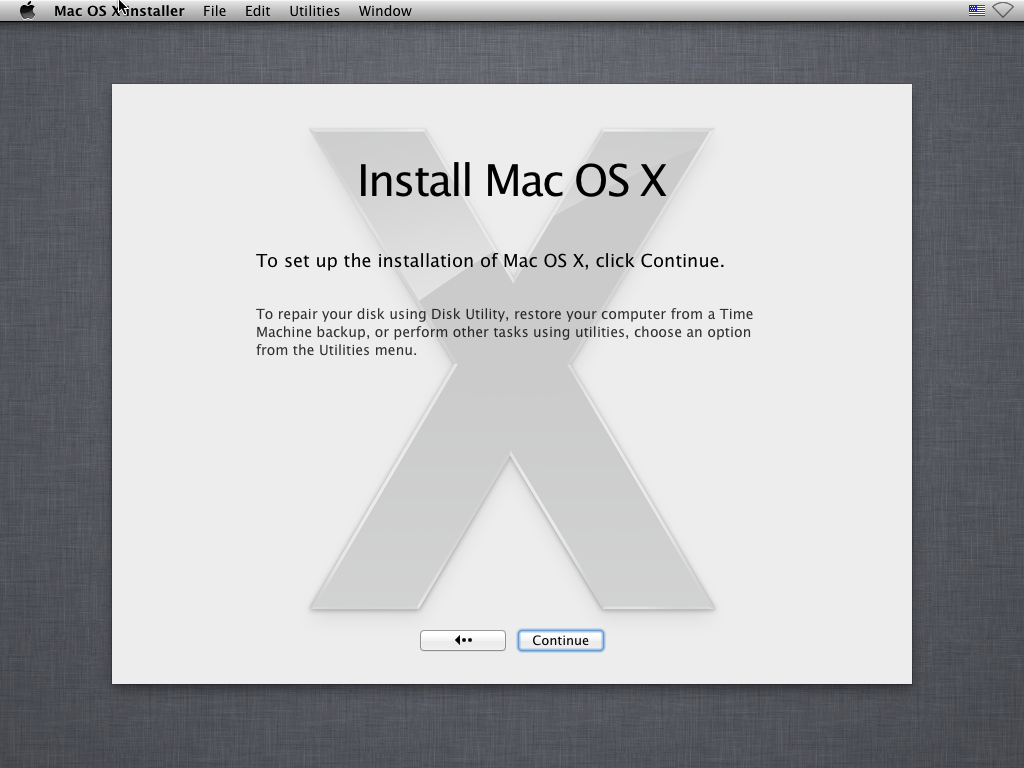
Once launched, the Lion installer will ask you some questions about setup, spend some time unpacking files to your hard drive, restart your computer, and then do the rest on its own - OS X’s in-place OS upgrades are usually a bit smoother and a bit easier to recommend than Windows’, though that can vary based on the amount and type of files on your hard disk and your specific configuration. I never ran into issues throughout my testing, but your mileage may vary.
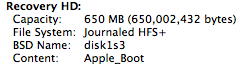
Like Windows 7, the Lion installer creates a small hidden system partition on your hard drive - in Lion, this recovery partition is to be used in lieu of your install CD in the event that you need to run diagnostics or reinstall your OS (if you burned Lion to a DVD, booting from it will get you the same interface and tools as the recovery partition, so pay attention). This partition is normally hidden from the end user in the Finder and Disk Utility, but is selectable when pressing the alt/option key at boot (and visible in System Profiler as a 650MB partition on your hard drive).
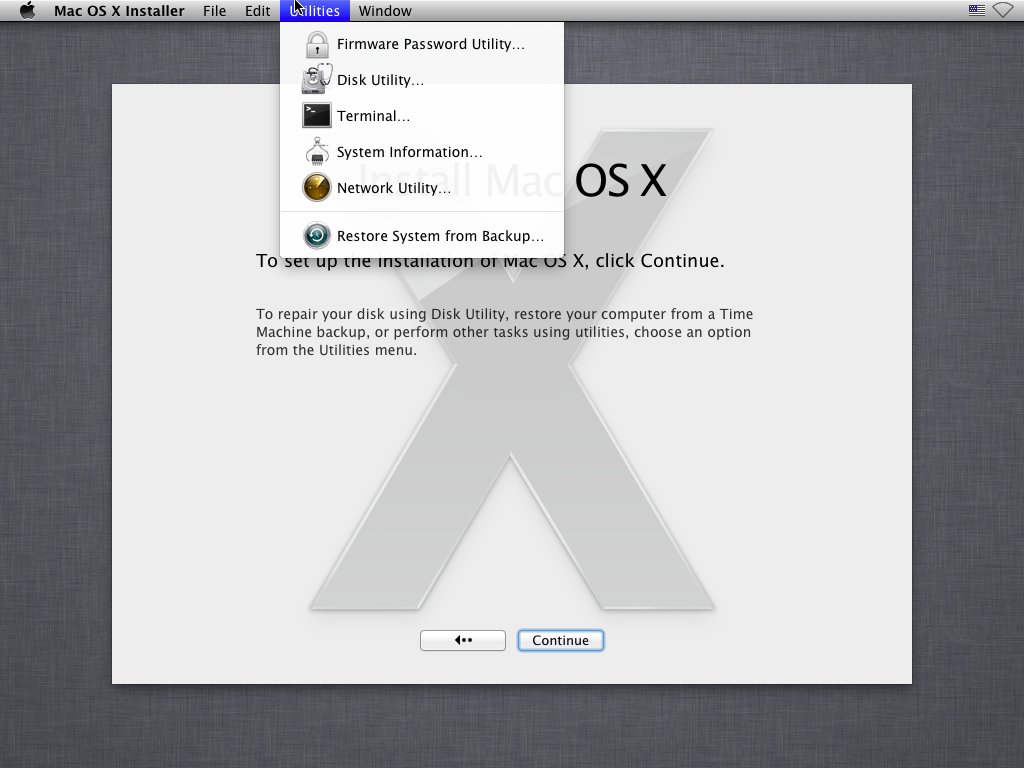
Missing from this list are the System Profiler and the Password Reset utility - I don’t know why the former is gone, but the latter is presumably missing for security reasons, since basically anyone armed with the Password Reset utility and physical access to your machine can change any local account’s password at will. To replace the functionality of this tool, Lion now gives you the option to recover your account password if you associate it with your Apple ID, which should work fine for most individuals (though perhaps not so much for system administrators).
If you didn’t burn a disc as outlined previously, the recovery partition also gives you your only option for a clean install of Lion - erase your hard drive using Disk Utility and then elect to install a fresh copy of Lion. At this point, you will be prompted for your Mac’s serial number, which is then communicated to Apple, and if it clears your Mac will re-download (sigh) and re-install the OS. This serial number check is OS X’s first real implementation of what anyone could call activation, though it’s worth noting that if you install Lion from a .DMG copied to another disk, the OS will still install without any checks.
The last thing the recovery partition is used for is to store FileVault information, which we’ll talk more about later on in the review.
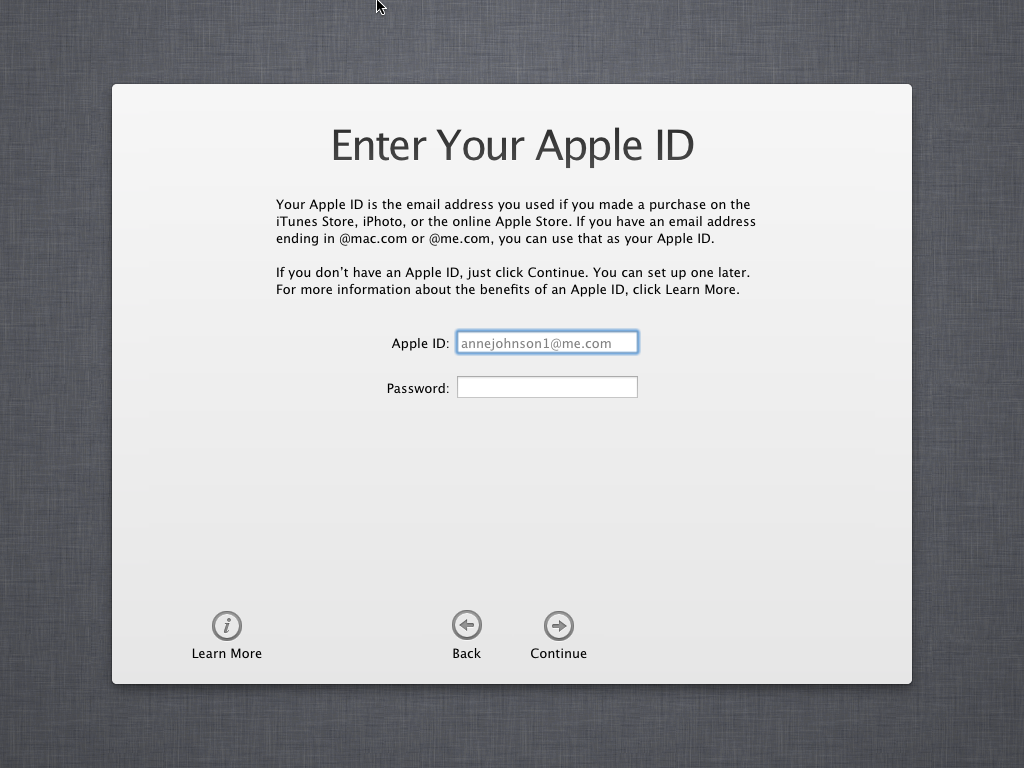
Once the installer is complete, people who did an upgrade install will be able to start using Lion pretty much immediately - aside from the (optional) registration form, there’s not really anymore to it. People who did a clean install (or who have new Macs preloaded with Lion) will be taken through the standard first-time setup process, which is mostly identical to that of OS X versions past with a couple of changes: first, the customary OS X welcome movie has been completely removed (possibly in another effort to save on download size). Second, users are now given the option to associate their Mac with an Apple ID, and to give that Apple ID the ability to recover their local account password. Last, on Macs with multitouch-enabled trackpads and mice, the OS literally forces you to use a two-fingered scrolling gesture to click the “Start Using OS X” button. How’s that for pushing new features?
All OS X versions, even the “no new features” Snow Leopard release, have made some changes to the way things look without much affecting how they act, and Lion is no exception to this.
The first (and perhaps most obvious) change is to the login screen itself. In all previous OS X versions, this has taken the form of a white box with the OS’s default wallpaper as a backdrop, with either a vertically-aligned list of users or a pair of fields where you enter your username and password (depending on the number of users on your Mac and the way you’ve configured your login screen to work).
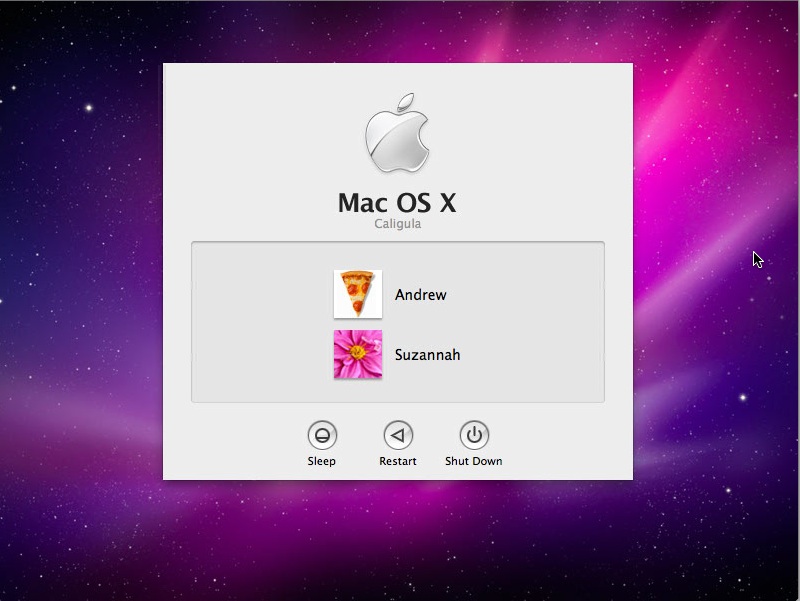
In Lion, this has been exchanged for a simpler-looking horizontally-aligned list of users against an iOS-like textured background (again, depending on your login screen’s setup).
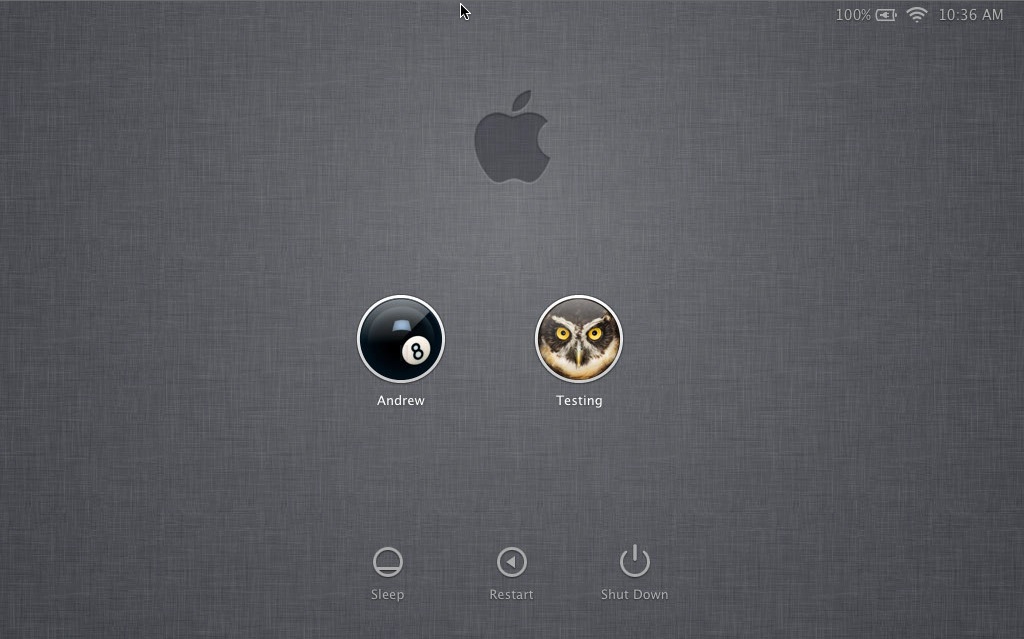
The login screen is marginally more useful in Lion, since you can see your computer’s wireless status, battery life, and clock in the upper-right hand corner without logging in.
This information is also shown on the lock screen, which has also been changed – it’s easier to show than to tell, as you’ll see below – and this makes it that much easier to check your Mac’s battery status without having to authenticate.
Login, and your desktop now fades into view in an iOS-esque way. In fact, Lion has a good bit more fading and zooming than Snow Leopard - most notification messages now employ some graphical razzle-dazzle and jump out at you instead of just appearing, which you’ll either think looks slick or frivolous, depending on the kind of user you are.
Fading, sliding, and zooming aside, the desktop looks pretty much identical to Snow Leopard’s, with the exception of yet another space-themed default wallpaper - The Dock and the taskbar look and act the same way as they did in the previous OS X version. One behavioral difference: windows throughout the OS can now be resized by clicking and dragging any corner of the window - this is one of those oh-wow-is-this-seriously-only-happening-now features that should have been in the OS ages ago, but that makes it no less welcome now that it’s finally here.
Apple continues its quest to get stuff off of your desktop by default – inserted discs and external drives no longer show up on the desktop by default (mounted network drives stopped showing up on the desktop by default in 10.5, and the computer’s internal hard drive stopped showing up by default in 10.6). You can switch all of this back on in the Finder’s preferences, just as before, but it’s another baby step away from an easily visible file system.
Lion also continues Apple’s slow shuffle away from the Aqua styling that defined the OS when it was originally released. For starters, the subtler, more staid icons that have been creeping in since Leopard have replaced the colorful icons in the left-hand sidebar.
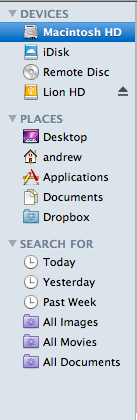
Snow Leopard sidebar (left) vs. Lion sidebar (right)
The scrollbars have also been changed, depending on what you’re using for input. If you’re using a multitouch-enabled device like the Magic Trackpad (or the large glass trackpads on most MacBooks from late 2008 onward), you’ll see scrollbars only as you actually scroll – they appear and disappear as they do in iOS. However, using an older-model trackpad or traditional keyboard and mouse will cause more standard, always-present scrollbars to appear.


Snow Leopard scrollbar (left) vs. Lion scrollbar (right). Lion's scrollbar will disappear if you're using a multitouch-enabled mouse or trackpad.
Next, turn your eyes to the upper left-hand corner of your window, where you’ll notice that the close-minimize-resize buttons have been reduced in size.


Snow Leopard's buttons (left) vs. Lion's smaller buttons (right).
If you then look at the rest of the window, you may notice that the color has been lightened slightly compared to Snow Leopard – this lighter color scheme occasionally threw me off, since it’s somewhat similar to a deselected window in Snow Leopard – I occasionally thought that my clicks weren’t registering because the colors weren’t quite right.
The subtle color scheme changes also extend to buttons and progress bars in the Lion, which have shed their bright Aqua-blue in favor of a less-shiny and slightly darker blue. Notice that button shapes have also moved away from the shiny, round Aqua-style to a more traditional rounded rectangle.
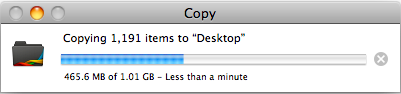

Snow Leopard progress bar (top) vs. Lion progress bar (bottom)


Snow Leopard buttons (top) vs. Lion buttons (bottom)
Last, let's talk branding: The AirPort status indicator in the menu bar is now labeled Wi-Fi instead of AirPort, a small but welcome step away from a sometimes-confusing moniker. Apple's wireless hardware is still called AirPort in the System Profiler, and Apple's just-refreshed routers are still called AirPort Extreme, so it's likely that the branding will stick around - it's just not as readily evident in the OS.
None of these changes are going to have much, if any, effect on how you use the OS, but they’re there and you should know about them. OS X has been shedding the old, colorful Aqua in favor of a more reserved (if a bit less distinct) Aqua UI for awhile now, and Lion continues in that direction.
Now that we've talked a bit about how things look in general, let's talk a bit more about the Finder specifically.
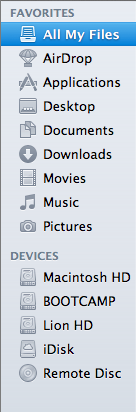
My first impression of the Finder was that it had lost some weight - Finder windows, in general, can now show the same amount or more using the same number of pixels, though that does come at the expense of some functionality. The arrangement and spacing of the left sidebar has been adjusted to take up less space than before, which is especially welcome on 11” and 13” Macs. Note that the Devices field now shows up at the bottom of the list instead of the top, another small step toward obscuring the filesystem (and, as well, steering newbie users away from just dumping everything on the desktop or the root of their drive).
Finder windows also shed some pixels (and, yes, I’m going to harp on this some more, downplay the notion of “files” and “disk space”) by removing the bottom toolbar by default - the one that shows the number of items in a given folder and the amount of disk space remaining on the volume, along with the slider that allows users to easily change the size of the icons. Thankfully, those who miss these features can switch them back on by opting to “Show Toolbar” up in the View menu.
Also missing is the button in the upper right-hand corner that would invoke icon-only view - those of you who use it will have to become acquainted with Alt+Command+T, a keyboard shortcut that toggles this change.
The default view when you open up a new Finder window now is called “All My Files,” which uses Spotlight’s file indexing to show you all files of a certain type no matter where they are on your hard drive - this is similar to Windows 7’s Libraries in that it groups your files together in one place without actually altering the fundamental directory structure (i.e., documents show up in All My Files, but they're still physically stored in the Documents folder).
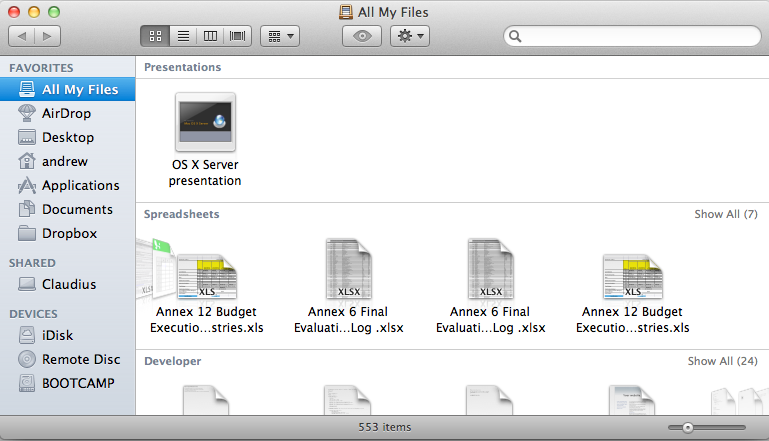
All My Files is organized by rows, and by default, you’ll be shown just the first few files of a given type in each row - clicking on the left and right-hand side of the row will allow you to navigate through the files, and you can also click “show all” to see your icons tiled in a more traditional Finder view.
Snow Leopard introduced the ability to thumb through multi-page documents, PDFs, and presentations, and Lion further enhances that functionality by adding a full screen mode to Quick Look (which is still invoked by selecting a file and hitting the spacebar).
Finally, Finder gains some abilities that Windows Explorer has had, like, forever: the ability to merge two folders of the same name, and the ability to keep two files of the same name during a copy operation by renaming one of them. It's boring stuff and Windows has done it for years, but that doesn't make me appreciate it less now that Apple has finally implemented it.
System Information (called System Profiler in all previous OS X versions) is, more or less, Apple's version of Windows’ Device Manager. Its aim is to tell the user what his hardware consists of. It can be accessed from About this Mac by clicking “More info” but it can also be found in Utilities folder in your Applications folder.
It's a bit confusing that you still have to hit the "More Info" button to get this new, much more informative About This Mac window - why not just get rid of the first window altogether and save the user the extra click? I'm nitpicking, I know, but this kind of redundancy is annoying.
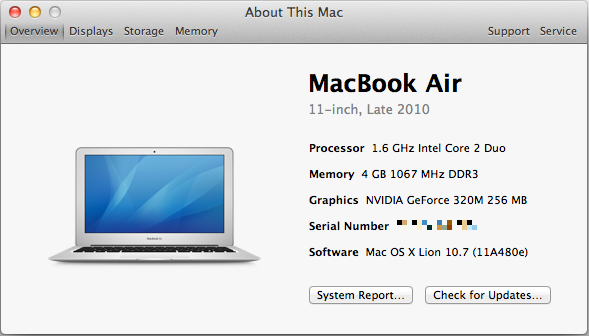
Anyway, when you open System Information, you will be provided an overview of your Mac. This includes information about your CPU, RAM, GPU, serial number and the OS you are running. It also tells you the obvious things: model of your Mac, screen size and revision. The overview information should be sufficient if you contact Apple or ask help in a forum, so the other end will know what Mac you have.
Down at the bottom, there are two links: the Check For Updates link just opens Software Update, and System Report gives you the look of old System Profiler with all the nitty-gritty details of your Mac. This hasn’t been iOS-ified (yet) so you can really see every small bit of information that you want to. This can be useful to more advanced users who want to know the speed of their SATA ports, for example.
Next tabs are displays, storage and memory:
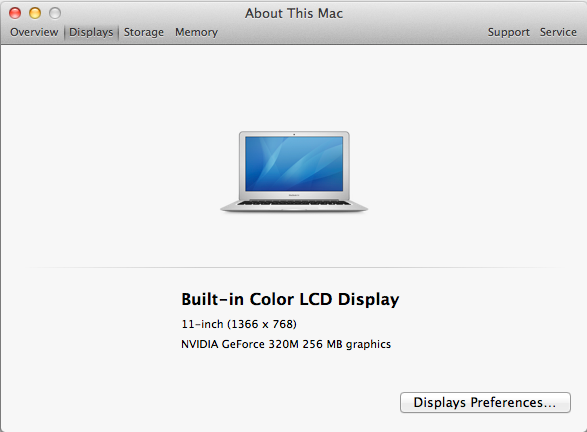
The display tab simply tells you what is the size of your screen, the resolution (including external displays, if connected )and the basic specs of your GPU. There is also a link to display preferences.
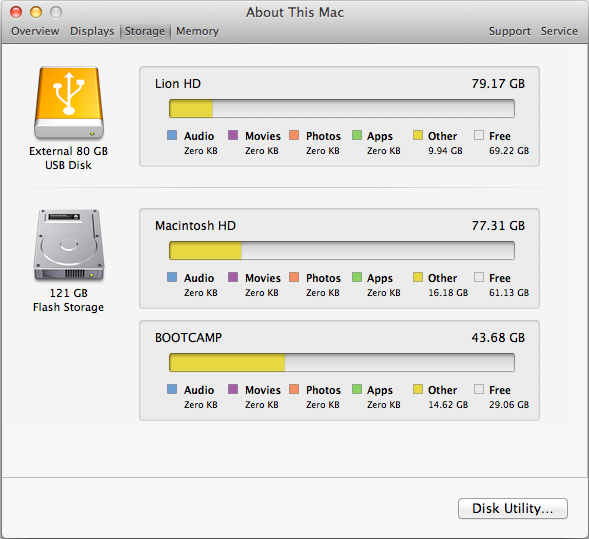
In the storage tab, you will get an iTunes-inspired view which tells you how much space you have in total and how much free space you have left on your internal hard drive and any external volumes (including optical discs). It also briefly shows you what kind of files are taking up space on your drives, e.g. Movies and Music. In the right bottom corner, there is a link to Disk Utility.
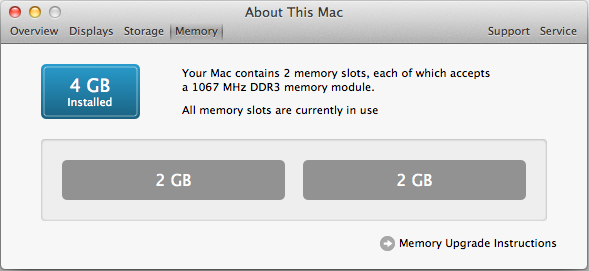
The memory tab offers a simple layout of your memory and tells what kind of RAM you Mac uses and whether you have free RAM slots or not. There is also a link to RAM upgrade instructions in the right bottom corner, which is definitely helpful for newbies who want to upgrade their RAM.
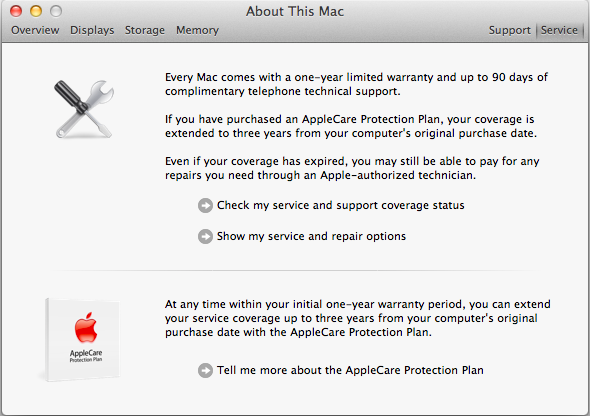
That isn’t all. In the right top corner, there are two tabs that are called Support and Service. The Support tab offers links to software and hardware help. Help Center includes basic guides for OS X and its apps, for example how to connect to WiFi network. The remaining four links just redirect you to appropriate pages on Apple’s site. In the Service tab, you will be provided with basic information concerning your Mac’s warranty and links to check your warranty status, repair options and additional details on AppleCare.
I think this is a step in right direction. The old System Profiler wasn’t very simple for an average user and could be confusing to navigate. The About this Mac window (which is still hanging around for some reason) didn’t always provide enough information either. The new System Information gives a balanced mix of hardware and software details with useful links for average users.
Another heavily-publicized feature of Lion is Versions, which keeps older copies of files as you save new ones and allows you to go back to previous copies to compare, restore, and copy-paste things you didn't mean to change. Unlike Resume, applications will need to be changed to support this functionality.
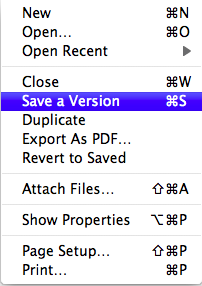
In a Versions-supporting program like TextEdit or Preview, you'll notice that the normal "Save" or command-S function is now called "Save a Version" instead. There's no special command you need to know to save Versions - if the app supports it, this happens automatically.
When you want to go back and look at your previous versions, select the Revert to Saved option in the menu to open the Versions interface.
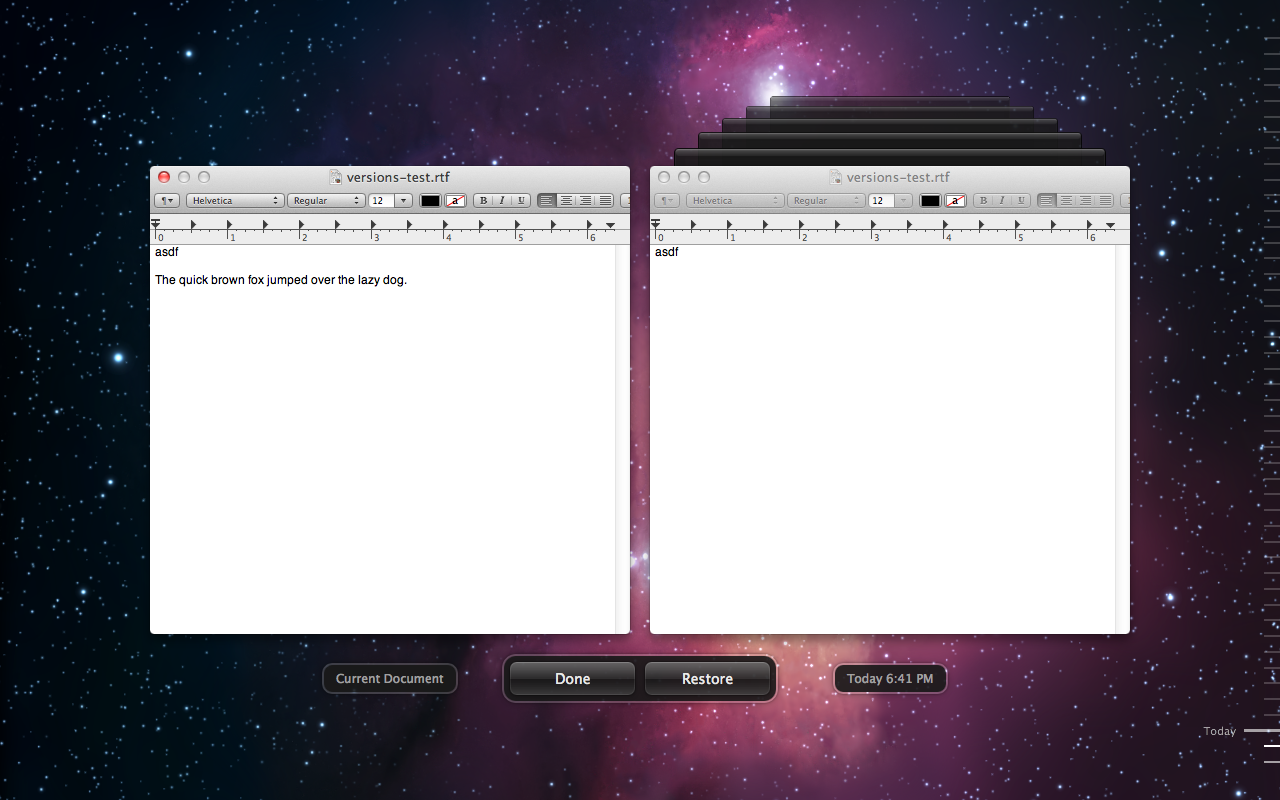
You'll be presented with a very Time Machine-esque interface that will let you browse through your previously saved copies, compare them to your working copy, and restore an old copy to be your new working copy.
So how does this work? Versions stores its data at the root of your OS volume in a hidden and locked-down folder called 'DocumentRevisions-V100". Files are saved using the UID for each user account (the UID is a unique number assigned to each user account at time of creation, and is normally hidden from the user. All UNIX and UNIX-like operating systems use UIDs for user accounts). In the screenshot below, "501" is my account's UID, and the numbered folders each correspond to an individual file.
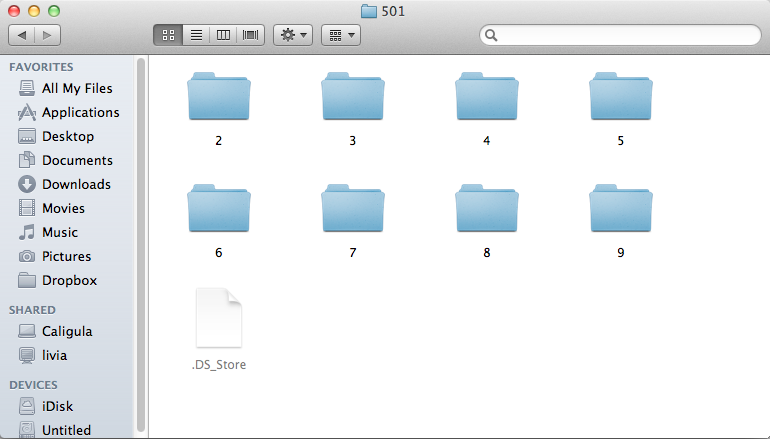
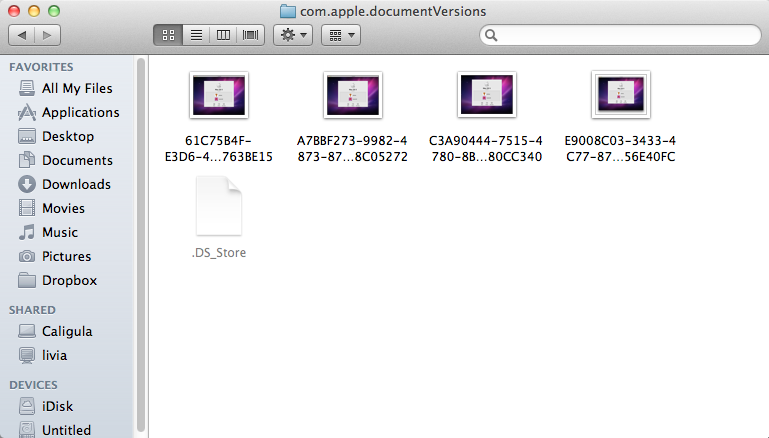
Drill down into any of the folders stored here, and you can see where OS X is keeping the older copies of your files.
Whenever you delete the source file, all stored versions of it are also deleted, so don't try to use Versions to recover accidentally deleted files - that's not what it's for, and you'll still need to be careful about what you do and don't keep.
It's not immediately obvious how many files OS X will store versions for, or how much disk space this hidden folder will take up if you let it, but disk space seems to be the limitation here - I was able to save 63 versions of an individual file without overwriting any older copies. Given Apple's desire to hide the seams and inner workings of OS X from regular users, I feel confident in saying that (1) OS X won't allow this system folder to take up so much space that it impacts OS performance or storage of regular files, and (2) there's probably some sort of safeguard present that will eventually begin deleting older versions of things as disk space runs low. This is how Time Machine works, and Versions is obviously taking cues from that feature.
Another of Lion's much-hyped features is Resume, the ability of the operating system and of individual apps to restore themselves to their last-opened state. Unlike Versions, support for Resume doesn't appear to require any effort on the part of developers.
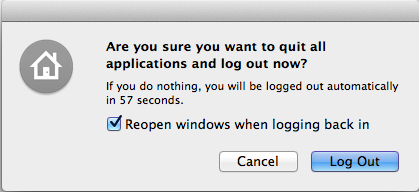
When shutting down or logging out, the OS will now offer to reopen your windows when you next login - you can opt not to, but the option is enabled by default.
Individual apps will now do the same thing - if you quit Word or Preview with items open, all of those items will reopen the next time you launch the program. This is only optional to a degree - there's no way (as best as I can tell) to disable resume for an application for a single instance as you can do with the OS. Your options are limited to enabling/disabling Resume for the entire user account using the control found in the General control panel.
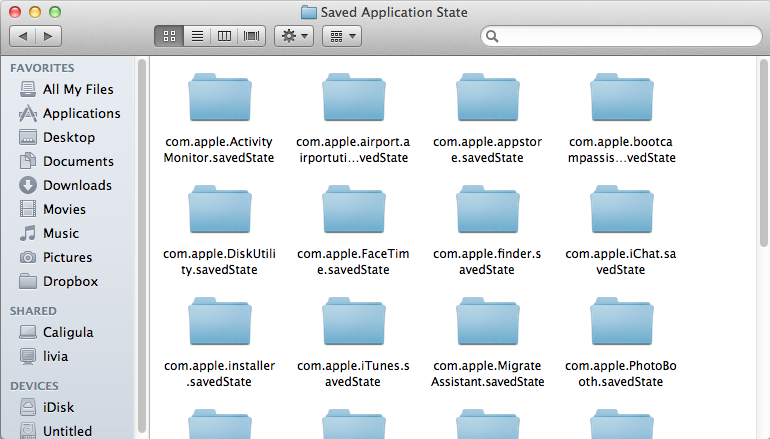
OS X stores information about application states in each user's profile, specifically in the now-hidden Library folder. Navigate there and open the Saved Application State folder, and you'll see folders for storing the states of every app you've opened on your Mac.
As with many of Lion's features, whether you like Resume will probably depend on how you work. In certain situations - crashes and restarts due to updates, for example - it's convenient to have all of your windows spring back open. Resuming individual apps was a bit more annoying - I actually like getting a clean slate when I reopen programs, so I found myself pressing command-W a bunch of times to close windows before I'd press command-Q to quit the program.
The main trouble for me is that all of your windows re-open whether you're just launching the program from the Dock or whether you're trying to open a specific file - I'd double click a Word file and get four different documents open at once instead of the one I actually wanted.
At best, Resume makes restarting your computer less troublesome than it once was. At its worst, it encourages and enables bad user behavior - the sort of people who will appreciate Resume the most are the same people who leave dozens of unused windows open in the background at all times, sucking up RAM and slowing down their computers. I can't tell people how to use their computers, but I can scold Apple for helping people use them poorly.
One of Lion’s biggest new features is totally new Exposé. Exposé’s task is to help people navigate between windows on the desktop. Considering that most of us often have more windows open than we can actually fit on the screen, a feature like Exposé has been very useful. With Lion, Apple has decided to take Exposé one step further and it now goes by a new name: Mission Control.
While Exposé was strictly limited to the apps open in your desktop (or one Space), Mission Control breaks the limits and adds Spaces into the mix. To simplify, Mission Control is just a combined version of old Exposé, Spaces, and the Dashboard.
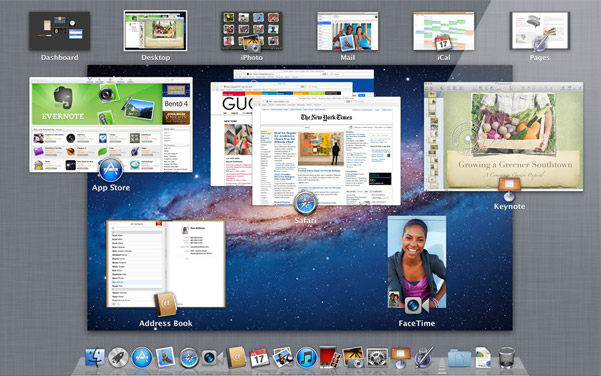
On the top, you have your available Spaces (and remember, each full screen app you have open will show up as its own Space). You can easily add a new Space by taking your mouse to the top right corner and clicking. The center is taken by Exposé-like app switcher which groups all your open windows togehter by app. If you have for instance three Safari windows open, they will be grouped together. The bottom is taken by Dock, which shows you what apps you have open.
Mission Control isn't as simple as the old Exposé, and if you have absolutely no use for Spaces, then I can see why you would like to use the old Exposé instead. The old Exposé was better at switching between random windows while Mission Control does a better job of switching between apps thanks to its neater grouping.
There is one disadvantage compared with Exposé though: if you minimize a window into app icon in the Dock, that window doesn't show up in Mission Control. The only way I’ve found is to use the Application Exposé, which is still present, by right-clicking the Dock icon and selecting “Show All Windows” (or, if you have a multitouch device, doing a two-fingered double tap on the app's icon in the Dock). For me, this is a big setback as I used that feature extensively and it's now more difficult to take advantage of.
Some avid Spaces users might also prefer the old Spaces, as you could have the whole screen dedicated to switching between Spaces if you wanted. Now you only have roughly 20% of the screen for Spaces when in Mission Control. It can be hard to switch between Spaces because the thumbnails in Mission Control are so small that you can’t easily see what's in each one.
While it’s not a big surprise, the old Exposé and Spaces are dead so there is not an option to disable Mission Control and use them instead. It's possible that third party software will bring back the old Exposé and/or Spaces, but no announcements have been made so far.
I think Mission Control does great job for the people it’s aimed at: consumers. The average user most likely won’t need more than five Spaces, of which the majority will be full screen applications. For that use, Mission Control is brilliant. Personally, I never used Spaces with Leopard or Snow Leopard but I find myself using Spaces daily in Lion. In earlier versions of OS X, Spaces was a feature that was a bit hidden - there was no dedicated button for it and it didn’t feel as integrated as it does with Lion, and Spaces simply didn’t feel as easy to use. Mission Control integrates Spaces into OS X in a much more convenient way.
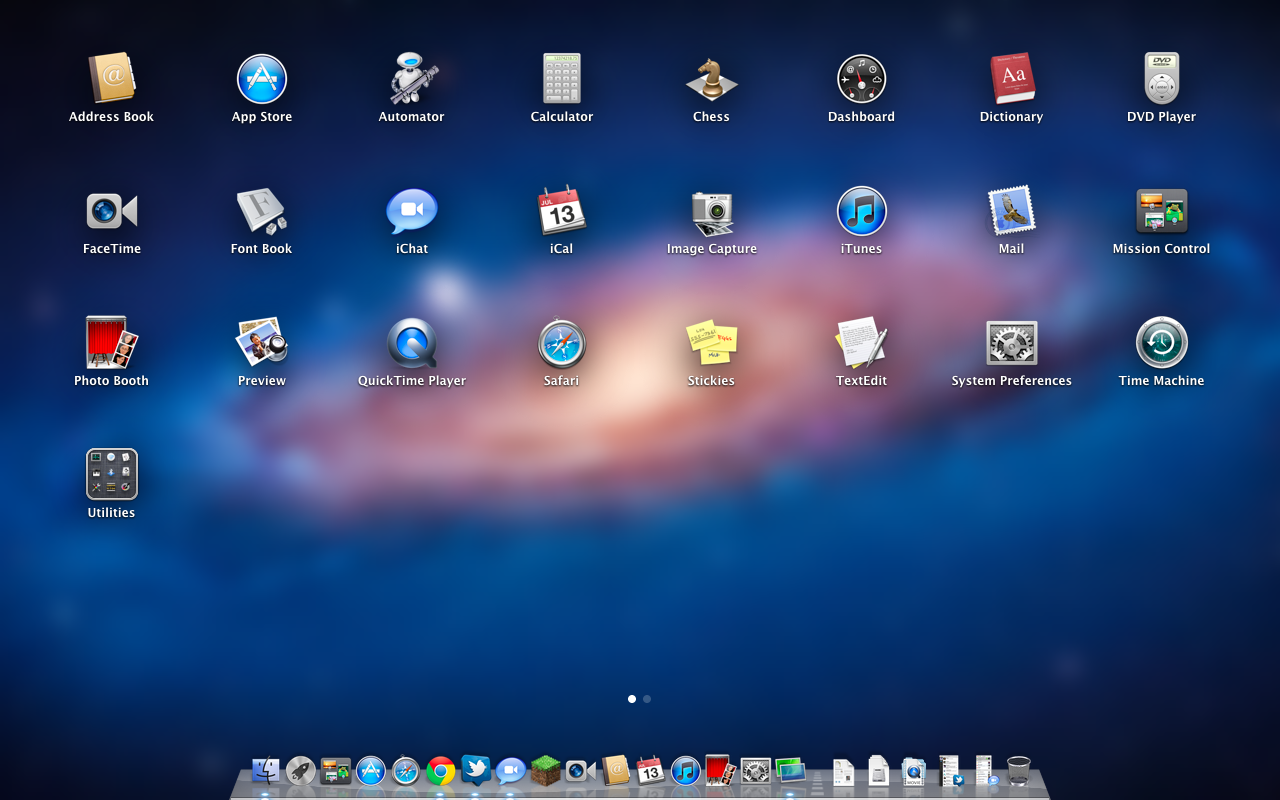
Launchpad
Launchpad is Apple’s new application launcher. It’s heavily influenced by iOS’s Home Screen and anyone who has used iOS will be familiar with Launchpad’s functions. Launchpad acts as an individual application so you can add it to Dock (though it is there by default) or you can launch it using a specific gesture, or simply Spotlight it. Once you trigger Launchpad, you're shown all of your Mac's programs in a tile layout identical to iOS's Home Screen, and its behavior is as expected: apps can be moved into folders, and can take up multiple pages which can be navigated using your touchpad or your mouse.
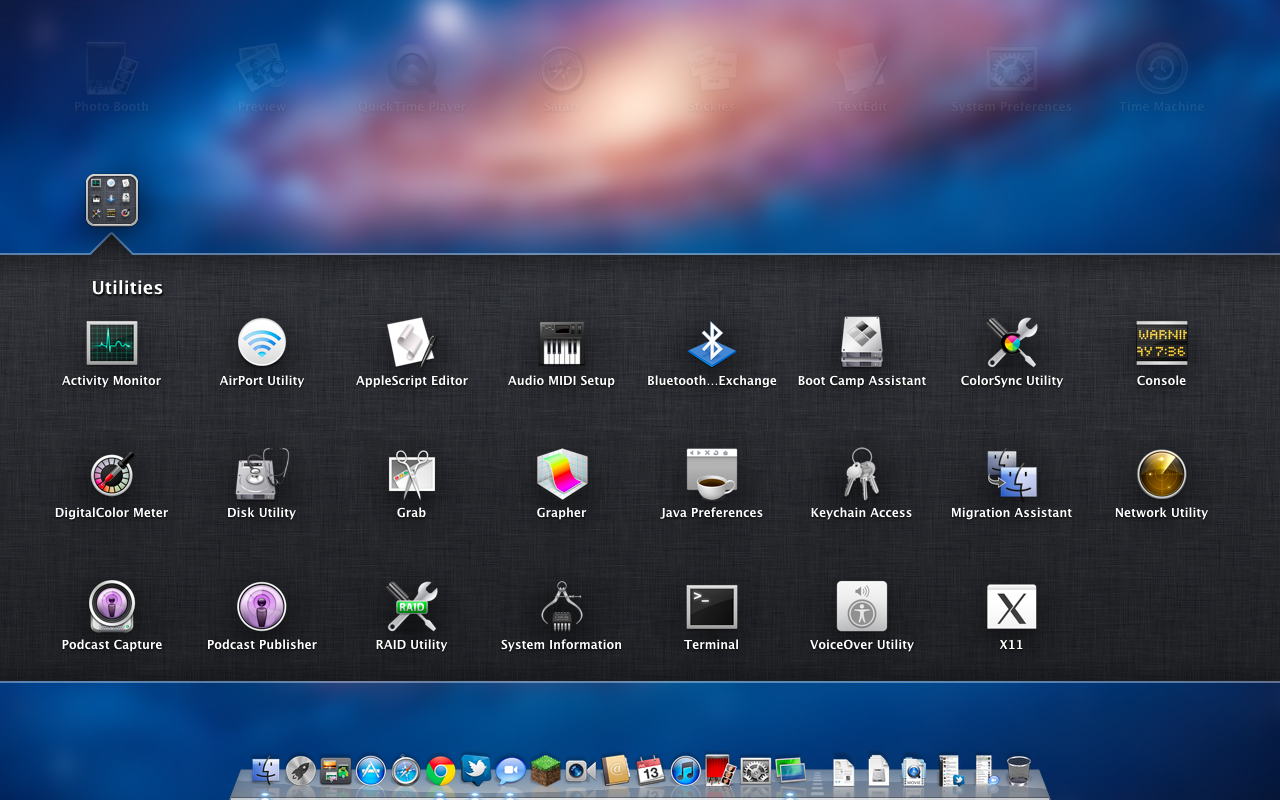
In all honesty, I find Launchpad to be fairly useless. I’ve been using Lion since the first Developer Preview and I’ve only used Launchpad a handful of times. There are a number of faster ways to launch an app, especially Spotlight. Maybe I’m a slave of my old habits but... I don’t find any use for Launchpad. It's one of the less successful iOS imports - it doesn’t fit in, nor does it bring anything truly new, since the Stacks feature has been doing same thing for a while now.
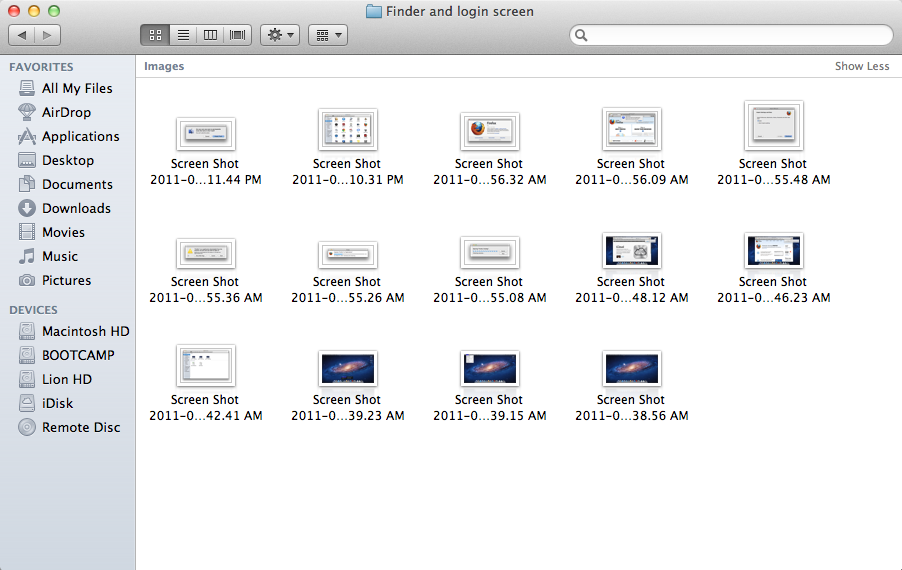
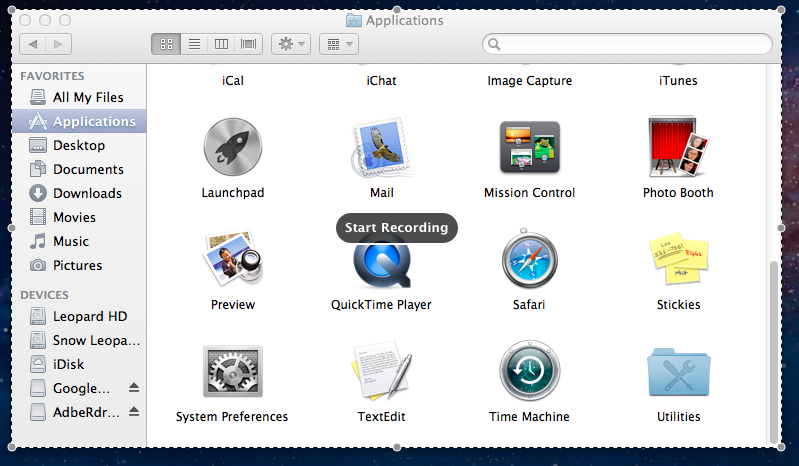
A Stacks view of the Applications folder. Look familiar?
Launchpad may, however, offer more utility on a laptop with multitouch trackpad because it is easy to trigger it with a gesture. On a desktop, the only way to open Launchpad is to either click it in Dock or use Spotlight, unless you have the Magic Trackpad. This even applies to Magic Mouse, although it is possible to add gestures using third party software. Making it so hard to access takes away its usability. Why would I open Launchpad to launch an app when I could open the app I want to open straightaway?
What I find the most irritating is that Launchpad does not recognize your existing folders. For instance, I have my Adobe apps neatly in Adobe CS5 folder, so they don’t take up my whole applications folder when I’m browsing it (very annoying with Stacks). I would have to group them again just for Launchpad. Call me lazy, but there are so many other ways to launch an app which doesn’t require that, and I think I will stick with them.
I can see Launchpad working well for users that don't have that many applications on their Mac however. With a single page of icons, Launchpad may be a more consumer-friendly way to launch applications. Perhaps this is Apple's way of introducing iOS users who've never owned a Mac to launching apps in OS X?
Full Screen
Safari in full screen
For people who have used Windows, making windows full screen may not seem like a big feature since it has been included in Windows for ages. In fact, it may sound a bit laughable considering that it has taken Apple this long to integrate any OS wide full screen feature to OS X. However, as usual, Apple likes to reinvent the wheel and do things differently than others, and full screen is no exception.
Apple’s approach is a bit more than just a maximize button. Earlier in this article, we talked about Mission Control and how it works. Basically, full screen windows act as individual Spaces. If you make a window full screen, it will create an own Space for that window. That way you don’t have to to exit from full screen when you want to change the window, you simply use the gestures to scroll between Spaces or use Mission Control. The end result is a truly monolithic experience where you're only interacting with one application at a time, and even then the resemblence to iOS is quite strong since full screen mode does away with the Dock and the OS menu bar.
In my opinion, Apple’s approach makes usage of full screen a little more complicated than in Windows but at the same time, full screen applications are more usable. You don’t need to minimize your full screen window in order to use other windows. You can also work with multiple full screen windows effortlessly. Full screen is not a big deal for desktops with hi-res screens since you have the screen estate for multiple windows but in a laptop, especially 13” and smaller, Full Screen can take better advantage of every single pixel on your screen.
There is one huge limitation though: running apps in full screen in multi-monitor setup is unusable. You simply cannot run an app in full screen in the other monitor while using another app in the second monitor. When in full screen mode, the other screen will only have the grey background, you cannot move any windows there nor launch any new apps. For example, you cannot run Mail in full screen in your second monitor while browsing Safari on your main monitor. And this is not the only issue. If you have a window on your second screen and make it full screen, it will be full screen in your main monitor. Essentially this means you cannot run apps in full screen in your second monitor, which is really a shame for people with multiple monitors. This is even present with QuickTime Player, you cannot use it to play movies on your TV for instance without making it your main monitor. Luckily this is only limited to QuickTime, and other players with their own full screen modes work fine.
Apple’s full screen approach definitely has its pros and cons over Microsoft’s but overall it’s a crucial feature for OS X and it’s surprising that it has taken this long for Apple to add it.
Lion introduces some new multi-touch gestures for the owners of a MacBook with a multi-touch trackpad, Magic Trackpad or Magic Mouse.
Trackpad
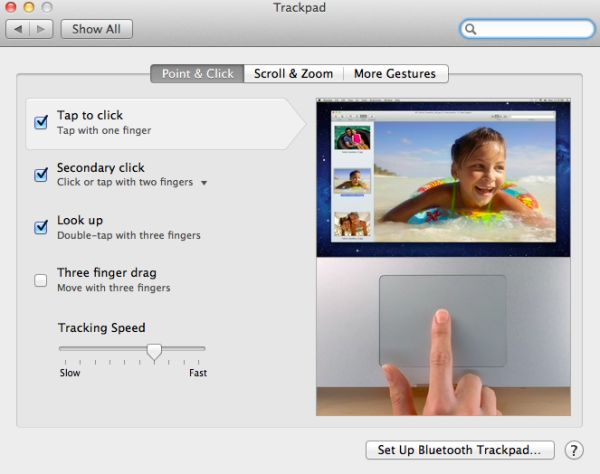
There are 14 gestures, divided into three categories: Point & Click, Scroll & Zoom and More Gestures. The first two new ones are under the Point & Click tab and they are called Look Up and Three finger dragging. The former is triggered by double-tapping with three fingers and it allows you to look up a word in the dictionary. Thee finger drag is fairly obvious and enabling it lets you drag windows with three fingers.
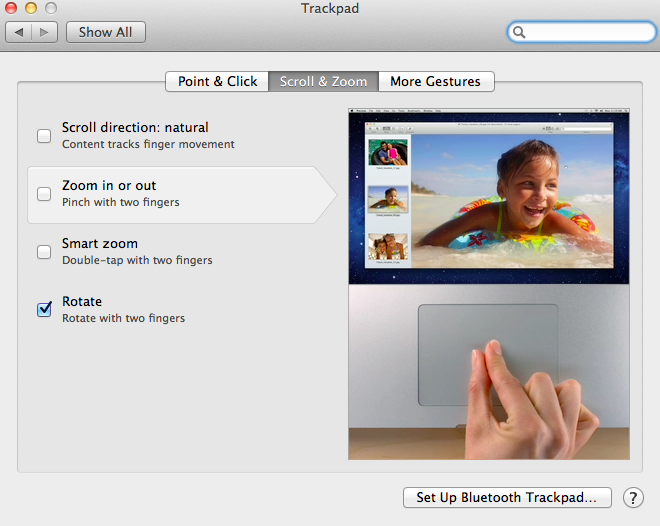
In Scroll & Zoom, you are provided four options of which two are new. The first option is Scroll direction and enabling it will make scrolling “natural.” Natural means the content follows your finger movement, so if you scroll down, the content will move up, just like In iOS. Natural scrolling is enabled by default but you can disable it to get back the old normal scrolling (finger moves down, content moves down). The next new option under Scroll & Zoom tab is Smart zoom. It's triggered by double-tapping with two fingers and as a result, the window will be zoomed to focus on the content you just double-tapped (e.g. Picture).
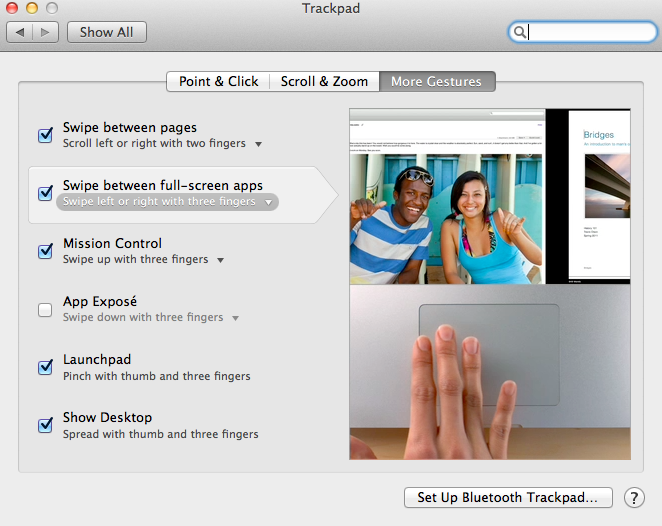
The final tab is More Gestures. The first gesture is Swiping between pages, which isn’t actually a new gesture but the animation is different. When you perform this gesture, it looks like the page is vanishing to either right or left, which is pretty cool. In Snow Leopard, this gesture was limited to three fingers but Lion allows you to set it for two or three fingers. Next up is Swipe between full-screen apps. By default, this is done with three fingers but you can also set it to be done with four. This is a great feature for users of full-screen apps or Spaces because now you can easily scroll between your Spaces. Below full-screen app swiping is a gesture for Mission Control. In Snow Leopard, Exposé was triggered by swiping up or down with four fingers but in Lion Mission Control is limited to swiping up but with three to four fingers depending on what you choose. Swiping down with three or four fingers will enable App Exposé, which shows the open windows for certain application. Last but not least, you have two gestures that are done by pinching or spreading with your thumb and three fingers. Pinching triggers Launchpad, while spreading shows your desktop.
Magic Mouse
With the Magic Mouse, the number of gestures is limited to six. The gestures are divided into two categories: Point & Click and More Gestures.
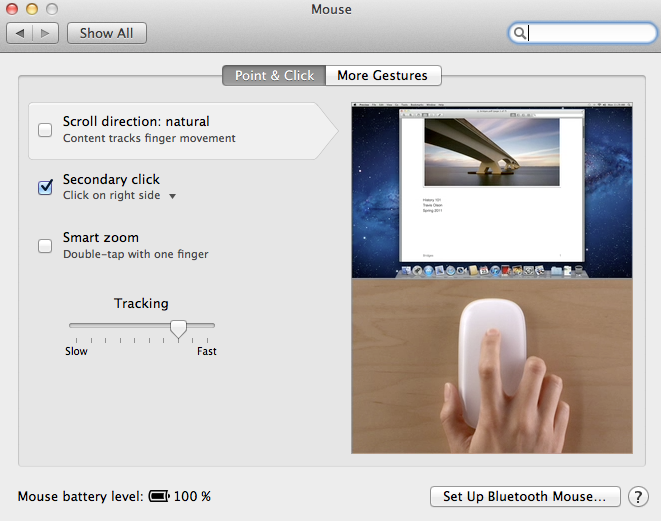
Point & Click offers three gestures in addition to tracking speed bar. The first one is Scroll direction which behaves exactly the same with the Magic Mouse as it does with the trackpad. The second one is secondary click, which is present in Snow Leopard as well. The third one is Smart zoom, which again is the same as the trackpad and can be enabled by double-tapping with one finger.
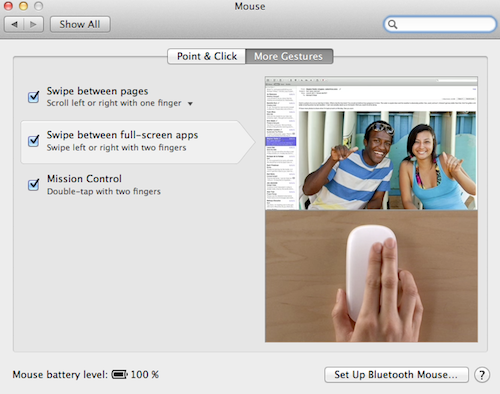
The More Gestures tab provides three more gestures: Swipe between pages, Swipe between full-screen apps and Mission Control. These are yet again similar to the gestures with trackpad, the only difference is the actual gesture. Swiping between pages can be done by scrolling left or right with one or two fingers. Swiping between full-screen apps is performed by swiping left of right with two fingers, there are no other options. Mission Control is triggered by double-tapping with two fingers.
Apple introduced the Mac App Store (MAS) in its Back To The Mac event last October. It was released to public on January 6th and was automatically included in the 10.6.6 update. It’s obvious that the MAS is a spinoff of Apple’s extremely popular iOS App Store. While the MAS has been available for over six months now, Lion will bring some healthy improvements.
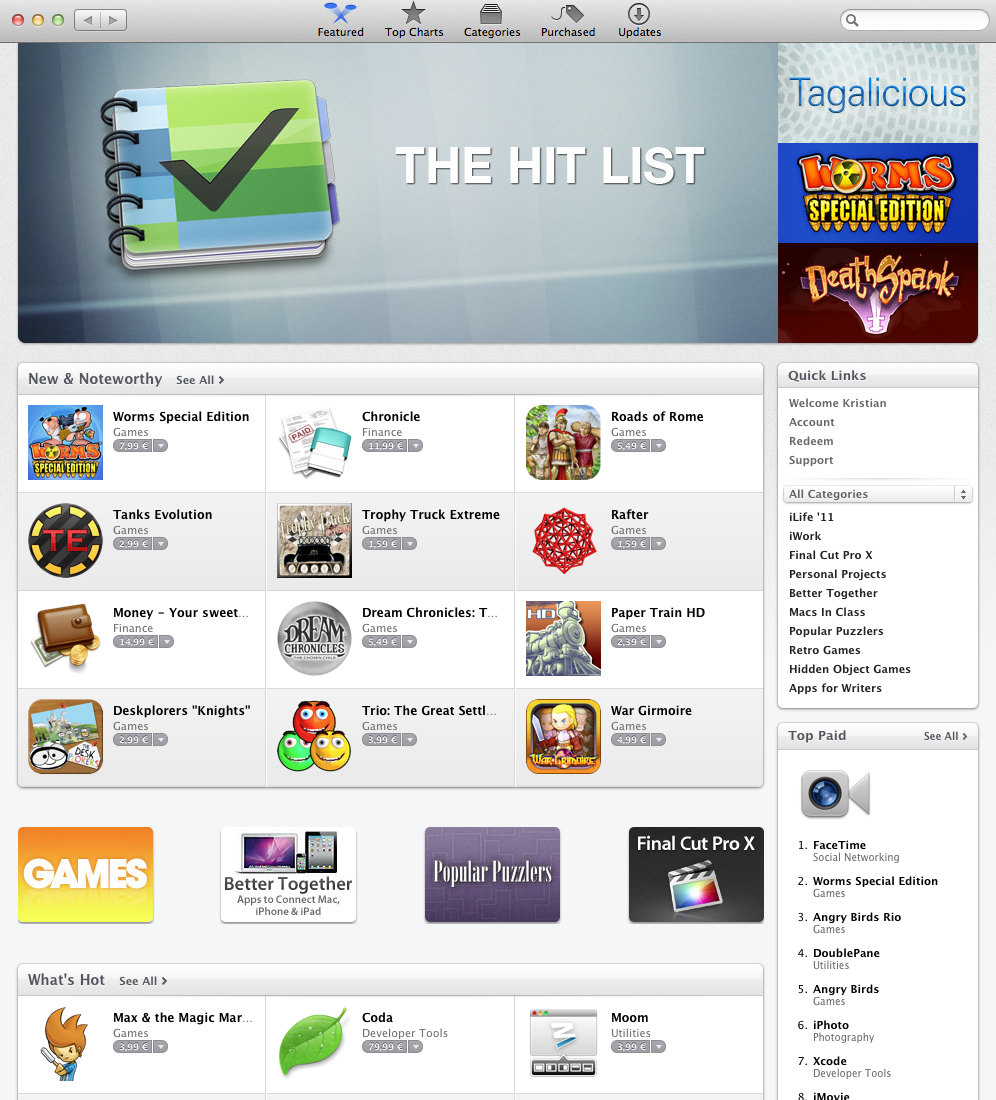
First, there will be support for in-app purchases. Since Apple does not allow trials, this is mainly useful for applications that can have additional commercial features or are subscription based.
Second, developers can now send push notifications to alert users. As in iOS, the usefulness of this feature varies from app to app, but the presence of third-party plugins like Growl speaks to the demand for this sort of thing.
Third, app updates are now just patches instead of full copies of the app. Apple refers to these as "delta updates," which is the traditional development term for an update delivered by replacing only the changed files/bytes in a application. In Snow Leopard and in iOS, you had to re-download the whole application to update it. That was very inefficient, especially if you were updating a bigger app. After iOS 5 comes out this fall, both it and OS X will feature app updates via patches, just like most other programs have been doing forever.
On a technical note, the structure of OS X application bundles makes them fairly well suited to these kinds of updates. But it's not clear at this time whether Apple is replacing whole files or doing binary patching to minimize the update size. Valve’s Steam service recently transitioned from doing file replacement to binary patching for this very reason, as games typically use a handful of large archives to store their content. For regular applications the difference is subtle, but the difference will have an impact on games distributed through the MAS.
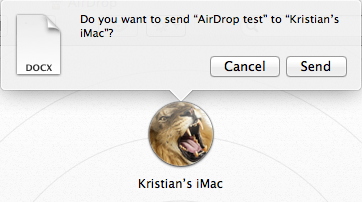
AirDrop is a feature which is supposed to simplify file sharing. Located on the left hand side of the Finder window, AirDrop allows you to send files wirelessly between two Macs running Lion. AirDrop's killer feature is that it uses a peer-to-peer WiFi connection between the computers so the computers don’t have to be on the same network, or on a network at all (ed: this is also faster since WiFi is a shared medium; router retransmissions halve effective bandwidth). AirDrop doesn’t require any configuration either, it should just work.
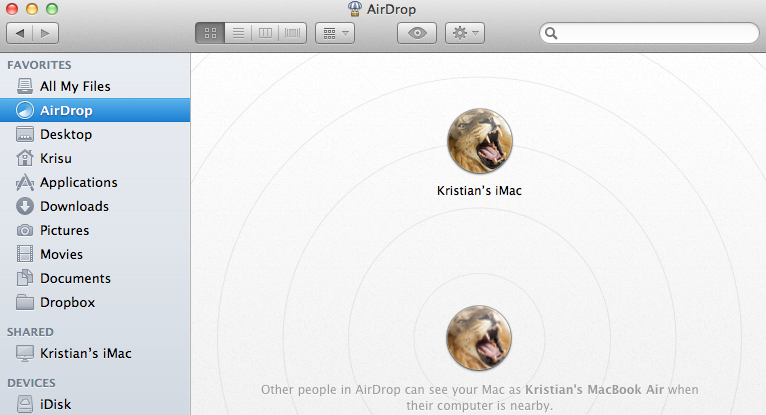
Using AirDrop is extremely easy. You must simply have the AirDrop window open and be within range, and your Mac will be discoverable by other Macs. Once your Mac spots another Mac, you can drag a file on top of the other Mac’s icon in AirDrop window and it will ask for your confirmation to send it. Click send and the receiver will be given an option to either save and open, decline or just save it. Files downloaded through AirDrop will be saved into your downloads folder.

AirDrop transfers are encrypted using TLS and AirDrop also creates a firewall between the sender and the receiver, so using AirDrop should be safe. You will only be visible to other Macs when the AirDrop window is open, there is no need to worry about getting random file transfer propositions when using your Mac in public. You can also verify the sender’s identity through his Apple ID.
AirDrop is a super convenient way to send files when you're physically near the recipient. There are still better options for moving tons of files between unmanned computers, and you'll need to rely on 3rd party solutions for sending files across long distances but AirDrop does offer an advantage in this specific case.
Mail, now at version 5.0, has gone through some pretty major overhauls in Lion. It is yet another feature that has clearly been inspired by iOS. The most obvious connection between iOS’s and Lion’s Mail is that received emails are grouped as conversations, which is supposed to make it easy to quickly review the email history on that topic. For users who hate iPad’s Mail, don’t worry, there is an option to use the classic layout in the preferences.
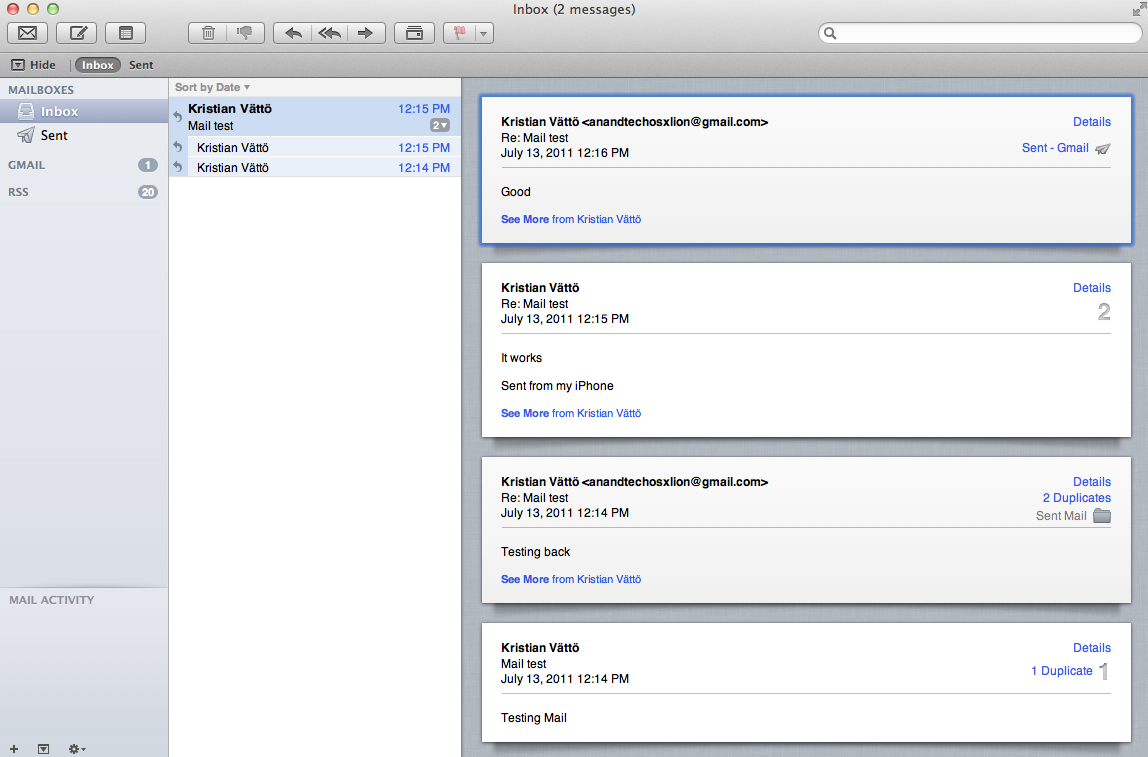
Lion's new Mail layout
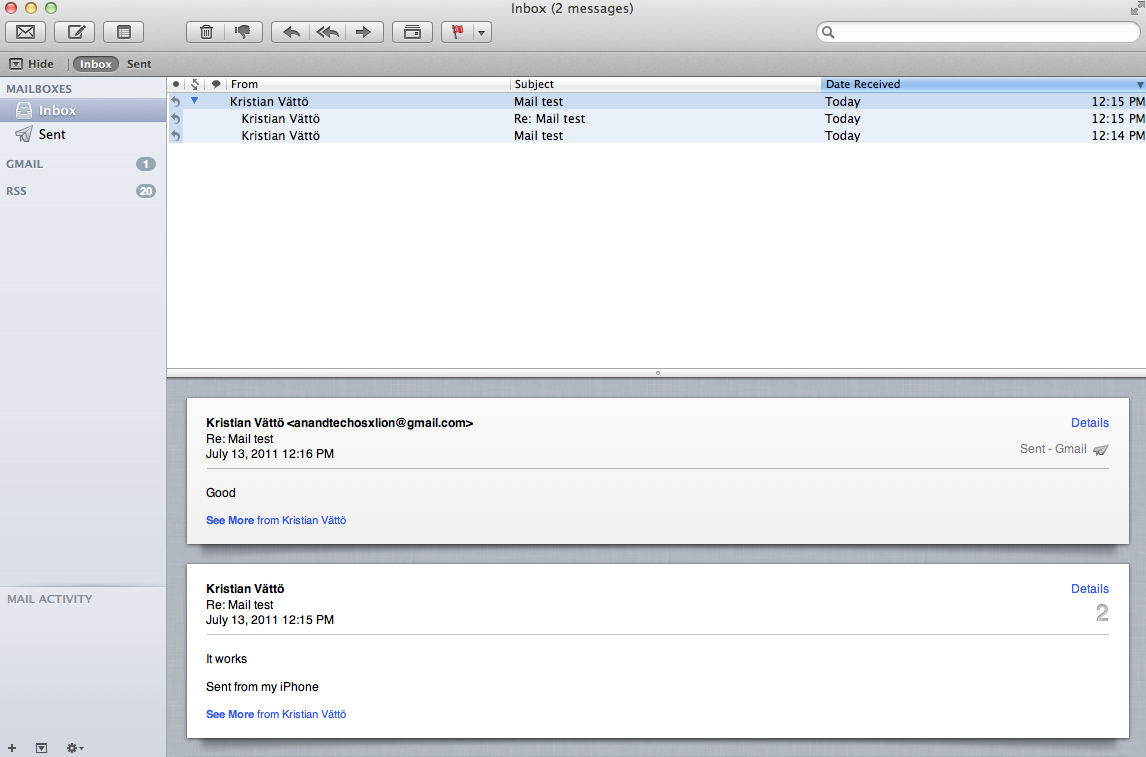
Classic layout
On the top, you have ten buttons by default: get new emails, trash or junk the email, reply, reply to all or forward the email, send new email, compose a new note, show relevant emails and the flagging button. Most of these buttons are straight from Snow Leopard and are the backbone of any email application, but there is at least one totally new button which shows the relevant emails or hides them. This is actually part of the new conversation layout, since showing relevant emails means that it will also show the emails that you have sent so it looks like a conversation. Disabling relevant emails simply hides your sent emails and shows only the emails you have received. The preferences have an option to automatically show the related emails as well so you don’t have to click the button every time you want to see the emails as a conversation. Users can customize the Mail toolbar by right-clicking it and selecting “Customize Toolbar…” which will reveal lots of different buttons, such as printing. Obviously, some of these buttons are only enabled when you have selected an actual email/conversations, and are greyed out if you have just selected a mailbox.
Below the toolbar, you have a small toolbar-like stripe that Apple calls the Favorites bar. It allows easy and fast navigation between mailboxes and is the most useful if you have hidden your mailboxes. You simply have shortcuts for inbox, sent items, notes and drafts mailboxes.
The email window is divided into three different sections. On the left-hand-side you have your mailboxes, which includes inbox, drafts, sent items, trash and so on. Next from the left you have the emails for the selected mailbox, which can be sorted by date, attachments, flags, sender, size, subject, receiver or based on whether they have been read or not. Finally, you have the actual email or email conversation on the right-hand-side that occupies roughly half of the window. Actually, if you hide the mailboxes, you can drag the center section to full size, meaning that you will only see the headers of the emails and you can then double-click the header to open it.
The similarities with iOS’s Mail don’t end here. There is now an option to list a preview of the email under the header, just like in iOS. The preview can be anywhere from one line to five lines depending on what you prefer, but it can also be totally disabled.
On the technical side, Lion’s Mail adds support for Microsoft Exchange 2010, which should be excellent news for users of Exchange. iCal and Address Book will also support Exchange 2010 so you should be able to take full advantage of OS X’s built-in apps, even as an Exchange user. Another good piece of news for Exchange users is the support for a vacation responder.
All in all, the new Mail offers a new convenient layout, and anyone who has used the iPad’s Mail should be familiar with it. I find it to be better than the old one, especially when in full screen mode. The conversations make it very simple to read earlier emails in a nice format (no quotes, or etc.) and the layout is logical and very easy to use. While iOS-ification in general may sound scary, it will bring us some great updates as well. The new Mail is one of them.
iCal is OS X’s calendar application and it sports a new look in Lion. As you might have guessed, the new look is yet again inspired by iPad’s Calendar app.
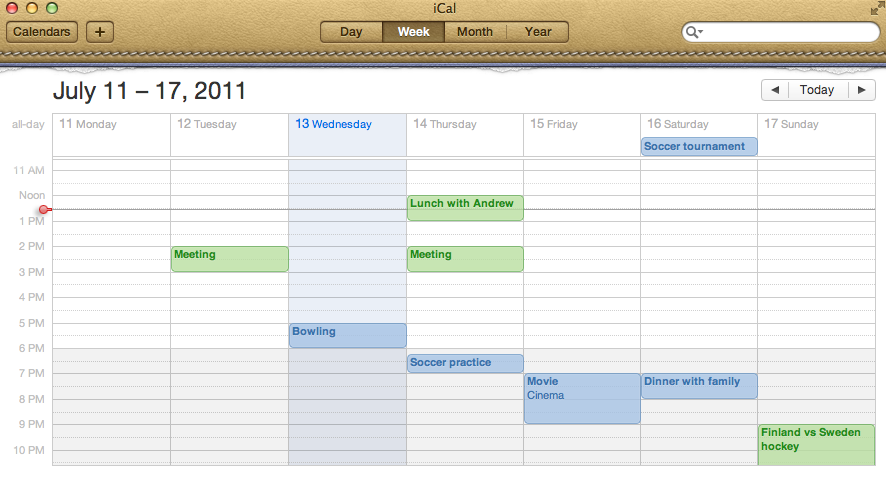
Weekly view
The most dramatic change occurs right when you open iCal - the toolbar is now beige leather-ish instead of the old iCal’s regular grey toolbar theme, apparently inspired by the increasingly obsolete personal organizer. Overall the look is simpler and cleaner compared to old iCal but the left-hand-side column is now totally gone which may affect the usability of iCal if you have multiple calendars. The column used to hold your calendars but they are now under a dedicated “Calendars” button. On the right-hand-side you can have a Reminders column which will be useful once iOS 5 becomes available.
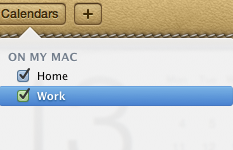
Calendars drop down menu
The redesign isn’t the only new thing, as Lion’s iCal has some new features as well, although they are more or less copied from iPad. The first new feature is Day view, which is exactly the same as on the iPad. On the left-hand side, you have a regular calendar with dates and below it you have a list of your upcoming events. On the right-hand-side, you have all the events for the selected day, which explains the Day view name of the tab. The Day view is actually present in Snow Leopard as well, but Lion takes it one step further by adding a running list of events instead of just a view of your day’s schedule, so this isn’t a totally new feature.
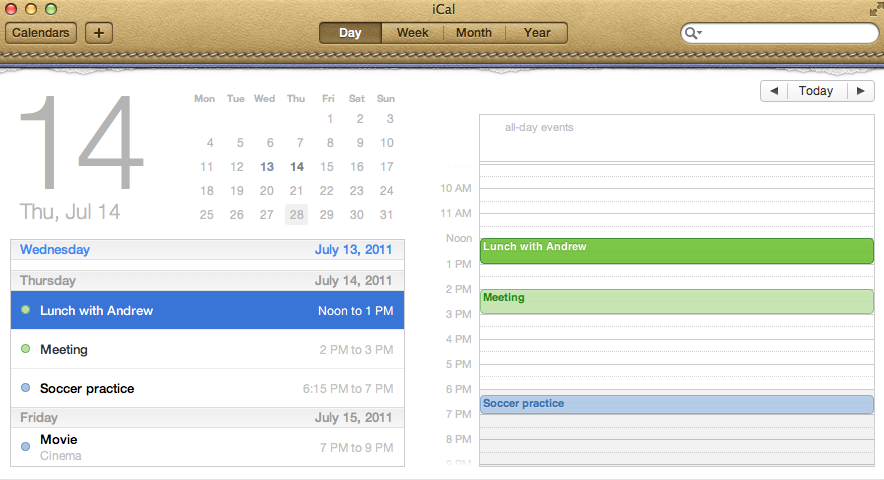
Day view
Probably the most interesting feature of the new iCal is Quick Add: you no longer have to set everything separately, you can just type it. For example, “Lunch with Anand on Friday at 1pm” would create an event on the following Friday at 1pm with the header “Lunch with Anand”. Of course, you can also use regular dates and set the duration. Another example could be “Dinner with Anand on 20th of June 4pm-5pm”. Once you add the event, you will be provided with the regular event editor which lets you set the location, repeat, alert and so on. Quick Add is a similar feature to what things like QuickCal and Google Calendar provide, so some users may already be familiar with the concept.

Quick Add
The biggest shortcoming of Quick Add is that the location must be entered separately, there is no way to “Quick Add” it. For instance, if you typed there “Party at Anand’s Place on Friday at 9pm”, it will create an event for that date but the name of the event will be “Party at Anand’s Place”, not “Party” and “Anand’s Place” as the location. If you were able to include the location in the Quick Add, Quick Add would actually provide a great overall solution for adding new events, but now you need to add the location separately, which kind of defeats the purpose. Of course, if you are fine with locations in the event name or without locations at all, then this isn’t a problem.
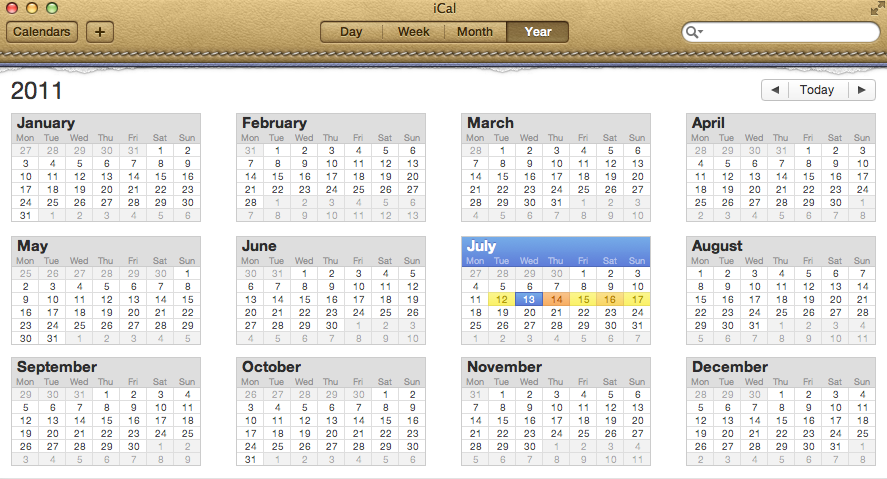
Yearly view
In addition to Quick Add and new look, Lion’s iCal also features a yearly view of your events. This can be useful when planning things weeks or months ahead. The days with activity are marked with colors, something which Apple calls as “Heat map”. Basically, the color shifts between yellow and red depending on how busy that day is. Plain white means there are no events scheduled for that day. Finally something that isn’t copied straight from iOS, although iOS 5 will bring a similar feature.
iCal also supports CalDAV, Exchange, MobileMe, Yahoo and Google calendars, so it’s easy to keep your mobile devices and other computers synced. These features are all present in Snow Leopard, though their continued inclusion in Lion is welcome.
All in all, the new iCal is likely something that will divide people. Anyone who likes the iPad version of Calendar should like and be familiar with Lion’s iCal, as they are very alike. Some users may prefer the old iCal and fortunately, there is already a workaround to get rid of the leather-ish look, you simply have to modify the iCal.app. Quick Add definitely sounds great and handy but essentially it is the only big refinement in addition to the new design.
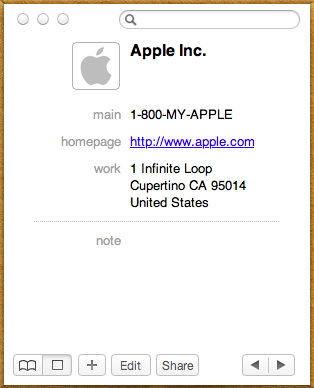
Like iCal and Mail, Address Book also gains a new, iPad-like look. Like on the iPad, you have a window that looks like a real personal organizer.
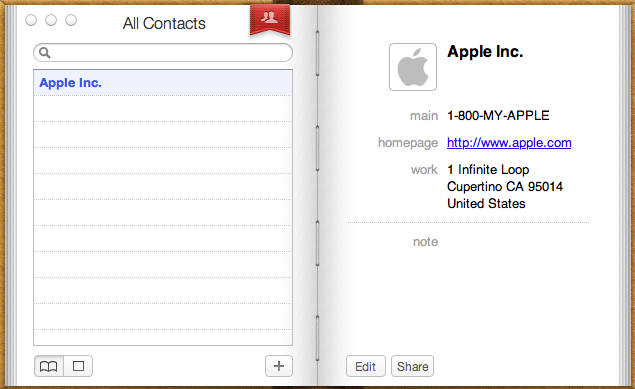
Standard Organizer layout
On the left-hand-side, you have a list of alphabetically sorted contacts. On the right-hand-side, you have the information for the contact you have selected. In the bottom right, there are two buttons: Edit and Share. Edit is fairly obvious and it simply lets you edit the information of the selected contact. Share button prompts you with a new email window with the contact’s .vcf file attached to it, so you can easily share contacts. There is also a plus button on the bottom which generates a new contact.
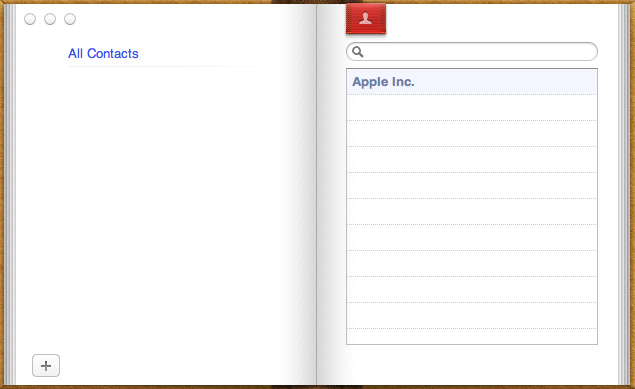
Simplified layout
In the left bottom corner, there is a button to change the layout. There are two options: The first one is the List & Card (organizer) view from iPad but second display mode provides a much more simplified view. You don’t have a list of contacts anymore, only the search bar, contact’s information and left and right arrow buttons. If you already know who you are looking for, this view is enough, you don’t need the list of contacts hogging your precious screen estate, you can just use the search.
Groups view
In the organizer view, there is a red bookmark and like in iPad’s Address Book, it takes you “one page backwards” to your list of groups. Many of us have different groups for relatives, co-workers and friends, so this can be useful. Groups were present in the old Address Book as well, so this isn’t a new feature, the user interface is just slightly different.
Apart from UI changes, there are a few new features too, which are mainly concentrated on improved social networking and instant messaging support. You should now see instant messaging availability in Address Book. If the contact is available, then there is a green ball next to the picture in Address Book. Red means the contact is away, just like in iChat. Unfortunately the support seems to be limited to iChat as we weren’t able to get any indication of user’s availability with MSN for example when using Adium. In addition to instant messaging support, you can now add social network profiles like Facebook to a contact's information. At least in our tests, adding a Facebook profile didn’t make any difference and you weren’t even able to access the profile though Address Book. FaceTime calls from Address Book are supported as well and can be started by just clicking an email address and choosing FaceTime.
All in all, the new Address Book isn’t that special. The biggest change is the UI and like all UI changes, it will divide people into two groups: Some people like it, others don’t. In my opinion, the new looks of iCal and Address Book don’t really suit with the overall look of OS X. All other windows have grey toolbars and overall designs but the brownish look of iCal and Address book stick out quite a lot. It works in iPad where all apps are full screen but when all of your other windows are greyish, iCal and Address Book windows look like they got lost from the iPad.
FileVault isn’t new to OS X, but the thing called FileVault in Lion is pretty drastically different from the FileVault that was first introduced in 10.3. Where the old FileVault would just encrypt a given user’s home folder by encapsulating it in an encrypted DMG disk image, it would leave the rest of the hard drive (all applications, system files, and unencrypted user accounts) unencrypted and potentially vulnerable.
FileVault in Lion makes the switch to volume encryption – the implementation is similar in many ways to the BitLocker drive encryption that ships with the Ultimate and Enterprise editions of Windows 7. Note that FileVault isn’t, strictly speaking, full disk encryption, so any other partitions on your Mac are not encrypted unless you reformat them separately, and non-Lion partitions (a Windows or Snow Leopard partition, for example) cannot be protected by the new FileVault.
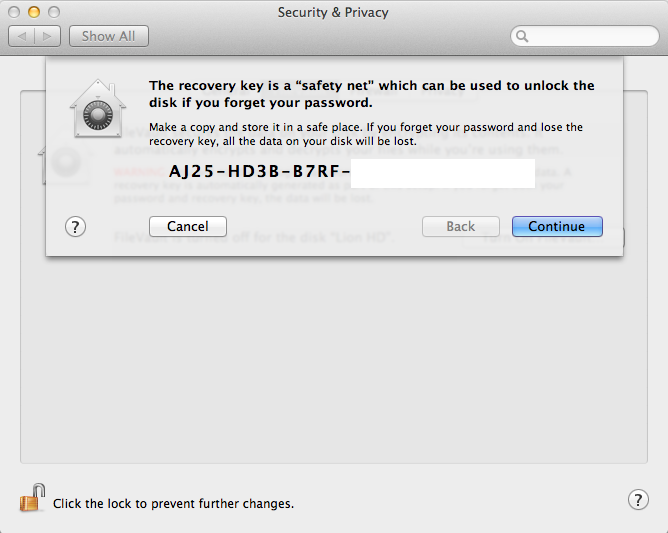
A FileVault encryption key
FileVault can still be found in the Security & Privacy System Preference pane. Click Turn on Filevault, and the Mac will generate a 24-digit recovery key that you can use to unlock or decrypt your hard drive in the event that you forget your account password. Losing this key and forgetting your local account’s password can be remedied if you chose to store your recovery key with Apple, who will give it back to you if you can properly answer three security questions they asked you when you setup FileVault. If you lose the key, forget your account password, and either neglect to store your key with Apple or forget the answers to any of your security questions, your data is gone.
This, of course, is how the technology is supposed to work, but it’s important that you know it was designed with no backdoor – you get in with your account’s password or your encryption key, or you don’t get in at all.
When cold booting, a FileVault-encrypted Mac uses the recovery partition we talked about earlier as a bootloader, since the main OS is now on an encrypted volume – you have to use the credentials of an approved user account to login before any OS files load. Once the OS does load, you’ll automatically be logged in as the user who unlocked the computer – you won’t need to login twice.
In the first of our BitLocker comparisons, it’s worth noting that BitLocker uses a small, unencrypted system partition to perform similar checks. If your Mac’s recovery partition is missing (for one reason or another – the most common reasons for this to happen are setting up Lion on a disk with an exotic partitioning scheme, or using a disk imaging program that doesn’t capture the recovery partition), FileVault will simply error out and tell you to reformat your hard drive, where Windows will offer to repartition your drive for you.
If you ever need to connect your hard drive to another Mac (whether through Target Disk Mode or otherwise) to rescue or access data on an encrypted drive, FileVault will allow you to access your data from any Mac running Lion as long as you have either your account password or your encryption key handy – when you plug the disk in, the OS will ask you to unlock it, and once unlocked you can work with the data as you would on an unencrypted drive (you can also unlock the drive manually in Disk Utility). This will only work on Macs running Lion – Macs running Snow Leopard or earlier will tell you that they can’t read the disk.
Also like BitLocker, the new FileVault also offers full volume encryption for any external disks, including Time Machine backup disks – when you plug an external drive into your Mac, the Time Machine dialog box now includes an option to encrypt your drive. Enter a password and a password hint (there is no recovery key for an external drive), and OS X will encrypt the drive for you. You can then use this password to unlock the drive on any Mac running Lion.
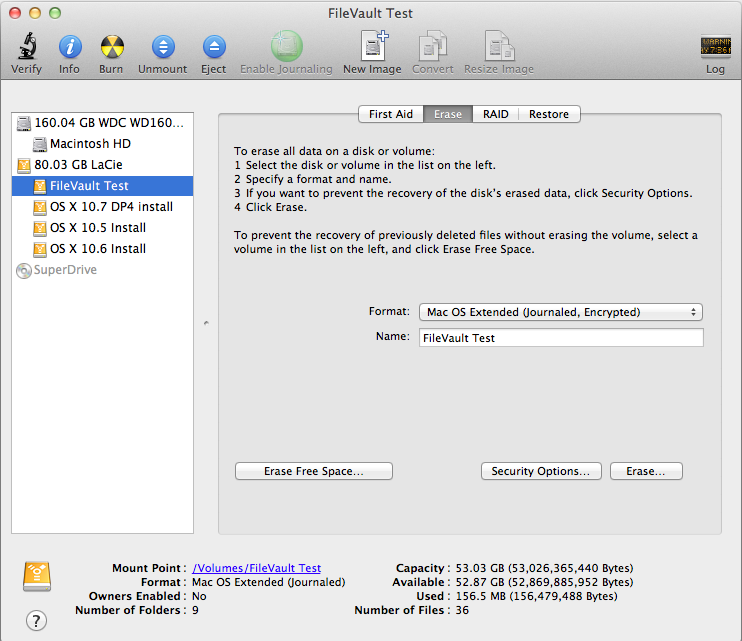
Creating an encrypted volume in Disk Utility
Any other volumes you’d like to encrypt can be encrypted using Disk Utility if you reformat the drive using the new Mac OS Extended (Journaled, Encrypted) option – as with Time Machine disks, you’ll be prompted to set a password and password hint, and then you’ll be good to go – the only downside is that there doesn’t appear to be a way to encrypt volumes without also reformatting them.
It should be noted that you don’t have to encrypt your Mac’s internal hard drive in order to encrypt external volumes. Also, remember that any FileVault-encrypted disks will be readable only by Macs running Lion – Snow Leopard, Windows, and all other operating systems won’t be able to interact with them (failing official Apple support for working with FileVault-encrypted volumes in a future Boot Camp update, which I’d say is unlikely to happen).
The new FileVault is a pretty great deal for individuals, and I can comfortably recommend it to any Mac user who travels with sensitive data. It’s a definite improvement over previous implementations, and anyone using FileVault in its current incarnation should appreciate the extra protection. For consumers, it’s a better deal than BitLocker is for Windows users, since BitLocker comes only with the premium Windows versions and works most seamlessly only with TPM hardware that most consumer-level laptops don’t have.
I can also see FileVault being useful for Mac-centric small-to-medium businesses, and businesses who lack the money for more expensive drive encryption software. However, for large businesses, FileVault’s lack of central manageability will probably reduce its potential usefulness. With no central console (which seems like a logical service for OS X Server to provide – get on that one, Apple), there’s no way to easily and automatically track large numbers of encryption keys. Also absent is a way to force encryption, and any administrator account with access to the Security & Privacy pane can decrypt the drive.
Businesses managing their Macs with Open Directory could prevent users from accessing this preference pane, but there’s still no way to prove that each and every Mac is encrypted at all times, which is something that many businesses are required to do.
FileVault Performance
With Lion sporting a more usable version of FileVault I was curious about its performance impact. I'd enabled FileVault on my personal machine and subjectively felt a performance impact, but I needed to quantify it. I put together a number of tests to do just that.
For all of these tests my test platform is a 15-inch MacBook Pro with a 2.2GHz Sandy Bridge Core i7 from early 2011 with an Apple branded 256GB SSD. In these tests I was primarily concerned with two things: how performance is affected, and what sort of extra load FileVault encryption places on the CPU.
Our first test is a simple file copy. I've got a directory of 2200MB worth of RAW files from a Nikon D700. I copy the folder from the SSD to the same SSD and report performance in MB/s:
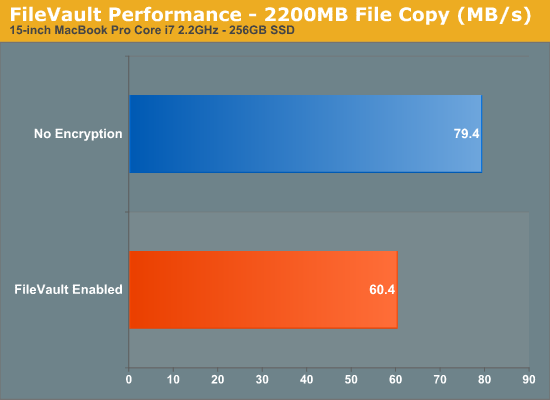
With FileVault enabled we take a 24% performance hit, hardly insignificant. Average CPU utilization during the file transfer actually dropped with FileVault enabled from 8.5% to 4.5%. I suspect the reason for the drop was the slower overall transfer rate. It would appear that FileVault, at least on a quad-core Sandy Bridge CPU has absolutely no overhead here. Given that Apple near-universally uses AES for symmetrical encryption, it's reasonable to assume here that FileVault is taking advantage of the AES-NI instructions on Intel's Core-i series of processors.
Our next test tested one of Lion's new features: threaded conversations in Mail. We timed how long it took to launch Mail and open a single email thread with 42 replies. If you've used OS X Mail in the past you'll know that CPU utilization goes insane if you're working on a thread with dozens of replies. The same is definitely true for threaded conversations in Lion.
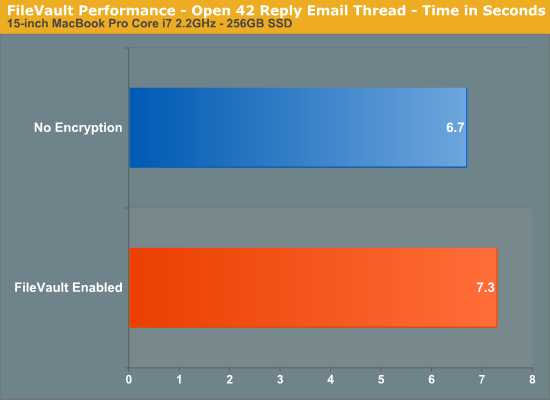
Thanks to the MacBook Pro's SSD both setups complete this task pretty quickly. There is a penalty associated with FileVault though - around 9% in this case. Peak CPU utilization was similar on both systems, 100% of four threads on the eight thread Core i7.
I grabbed a screenshot of the CPU utilization graph in Activity Monitor during this test for both setups:
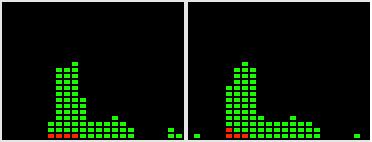
CPU Utilization: No Encryption (left) vs. FileVault Enabled (right)
While the two vary slightly, you can see that overall CPU utilization appears to be similar regardless of whether or not encryption is enabled.
Our third test is actually one of our standard OS X CPU benchmarks - we time the import of 203 RAW images into iPhoto. This task is impacted by both CPU and I/O performance:
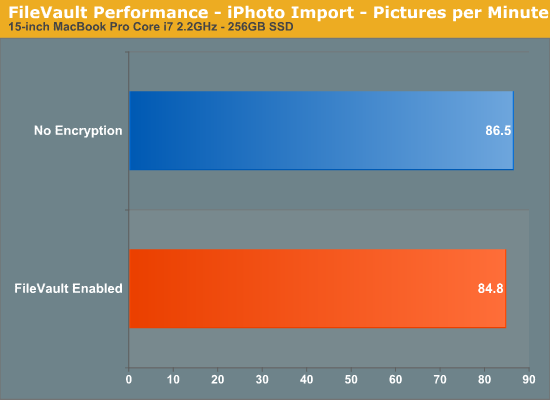
Despite the I/O dependency, there's virtually no performance impact to enabling FileVault here.
Our final tests are raw I/O tests using Quickbench. I focused on 4KB and 8KB random read/write since those are the most common transfer sizes for random file access. And for sequential operations I focused on 128KB transfers, again optimizing for common sizes.

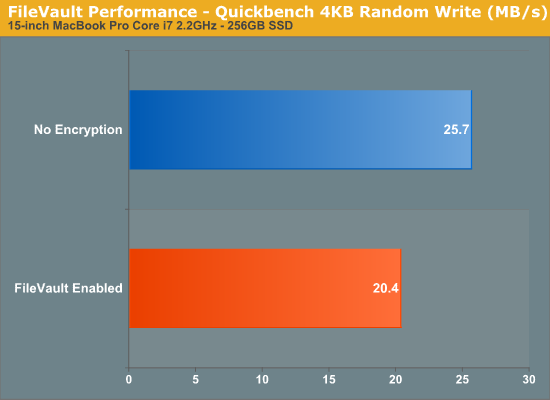
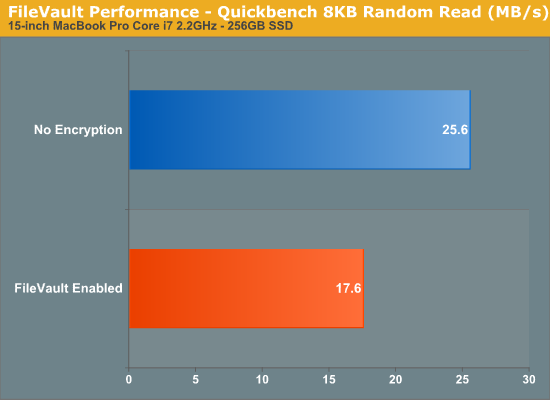
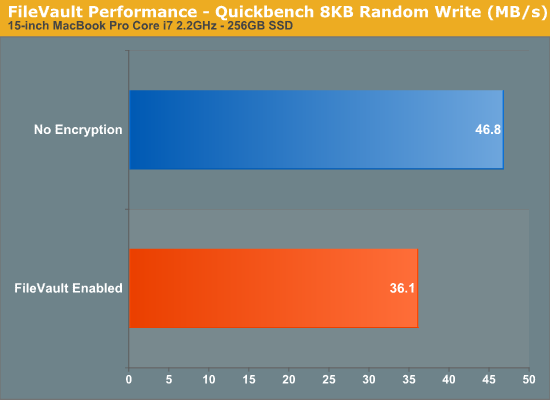
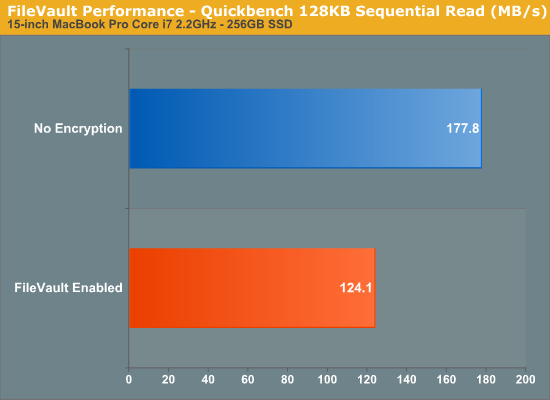
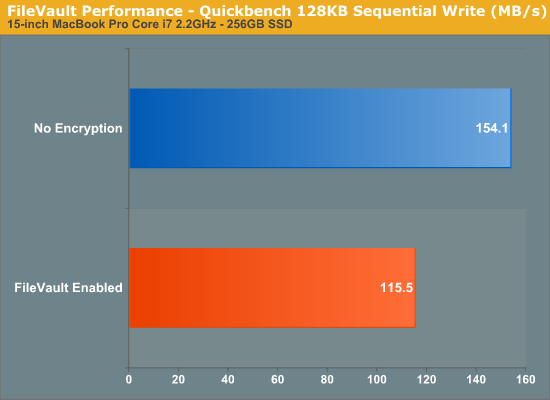
Overall the hit on pure I/O performance is in the 20 - 30% range. It's noticeable but not big enough to outweigh the benefits of full disk encryption. Note that under OS X there's still no way to take advantage of SSD controllers with FDE like the SF-1000/2000 series and the Intel SSD 320.
Safari
Snow Leopard is going to get the new Safari 5.1 when it comes out, so its users will be able to take advantage of JavaScript performance gains, support for new standards, and the security patches included in most new browser releases. In Lion, however, Safari gains a few new OS integration features that probably won’t be backported.
The best of these is a new download manager, which instead of being a separate window (IE, Firefox) or tab (Chrome) is a clickable drop-down window located in the upper right-hand corner of the browser window. Initiating a new download makes the file visually fly up to the button (more of OS X’s visual frippery), and you click this button to check on your downloads’ status (a small progress bar is visible at all times to give you a general sense of how your downloads are going).

As a heavy Chrome/Firefox user, I hope Google and Mozilla are paying enough attention to create their own versions of this.
The second is less interesting, but still useful - logging into a recognized email service (such as Gmail or Yahoo!) will invoke a dialog box asking you if you’d like to setup the account with OS X - this will sync your mail, calendar, and contacts for you (if the services are available from your email provider).
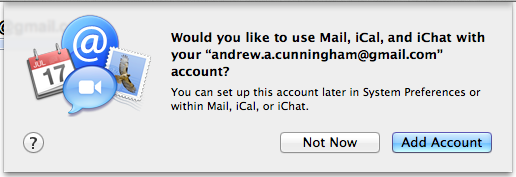
This generally works pretty well if you want to use the client apps, though I prefer to stick to web clients where possible.
iChat
iChat is still largely the same program it has been for some time, but it adds some enhancements it needs to protect itself from web clients (Google Talk, Facebook Chat) on one hand and existing third-party all-in-one clients (Adium, Trillian) on the other. It's all about adding support for different chat protocols, and to this end iChat in Lion adds support for Yahoo! Messenger and video chat, and also for the addition of other protocols via plug-ins. These plug-ins need only be downloaded and double-clicked to be installed.
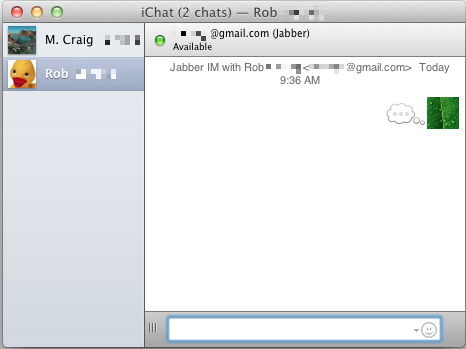
In use, iChat now presents you with a unified buddy list, with friends across all protocols showing up in one window instead of multiple windows. Conversations with different people show up in a single, vertically tabbed chat window (see above), which allows you to easily switch between conversations without switching between windows. You can break these out into separate windows by clicking and dragging the tabs, same as with most modern web browsers.
TextEdit
OS X's built-in text editor gets a couple of small enhancements: for one, it gains a more useful formatting bar, which is a nice change, and it also gains Versions support.
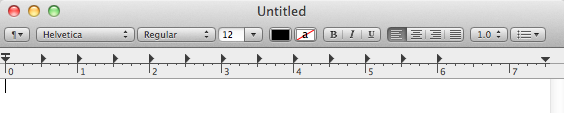
Despite these enhancements, anyone who needs to do real word processing is still going to install Word or Pages at his or her first opportunity. It's certainly nice to have a built-in program that includes basic support for most document file formats, but it's not exactly a replacement for a real word processor.
Preview
Preview in Lion adds Versions and full screen support, along with a new "Import from camera" feature, which will let you (among other things) take a picture of your signature with your iSight/FaceTime camera to sign PDF forms.
QuickTime X
QuickTime X, now at version 10.1, can cut, copy, and paste video and audio, restoring a missing piece of QuickTime Pro functionality that was much missed when Snow Leopard launched. It also gains the ability to trim, crop, rotate and resize video, as well as insert other videos - all of this makes QuickTime X more capable of serving as a basic video editor. Full screen support is also available; Versions support is not.
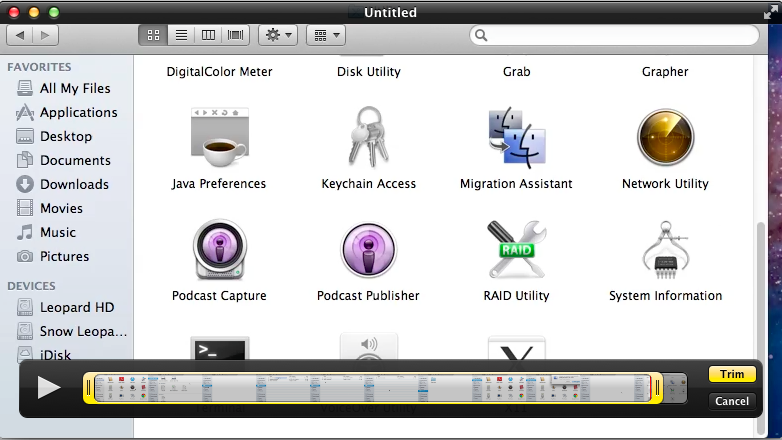
Trimming a video in QuickTime X
The screen recording feature can now be trained onto a single area of the screen, rather than just the whole screen - this mirrors the OS’s ability to do screen captures of a single window rather than the full screen. Simply invoke the screen capture feature and drag a box around the window you want to record.
Selecting a portion of the screen to record
Sidenote: Can anyone tell me when Apple plans to replace QuickTime 7 for Windows users? Seriously, if Apple could deliver something like this for Windows, QuickTime would go from being “that thing that installs with iTunes” to a really useful program. It doesn’t seem likely or anything, but I’m just saying...
Screen Sharing
The Screen Sharing app, now at version 1.3, gains several notable features useful for anyone for anyone who remotely administers Macs. This helps bring it up to speed with the Remote Desktop Connection features that Windows administrators like so much.
The first is the ability to switch between “observe” and “control” modes, depending on whether you want to control the Mac’s screen or simply look at what the remote user is doing. This has long been a feature of Apple Remote Desktop, but until the advent of the Mac App Store this was an enterprise-level product priced well out of reach of home users (and at $80, it still probably won’t find many fans outside the business crowd).
Second, and this is a feature so simple that I actually had to check my Snow Leopard install to make sure that I hadn’t missed it, Screen Sharing is now a full screen-capable app. This is especially useful if you’ve connected to a Mac with a higher screen resolution than yours - every pixel you can use for the remote connection makes navigating a bit easier.
Lastly and perhaps most interestingly, Screen Sharing in Lion now supports multiple simultaneous users to be logged into a Mac at once. This is unheard of in many client operating systems - similar functionality in Windows is only enabled in the server versions - and could enable OS X thin clients (at least in theory - the cost of Mac client computers and the inflexibility of thin clients would probably make such a solution more trouble than it was worth). It’s more likely that you’ll use it to log onto a Mac in some other area of the house without interrupting what its current user is doing, which is still plenty useful.
Boot Camp
The Boot Camp Assistant and its partitioning process work essentially the same way they did before, except that now all models download their Windows support software to external storage instead of using the OS install DVD (this was true of Snow Leopard on the 2010 MacBook Airs, though in my experience other models had trouble downloading the support files). The support file download in Lion is about 650MB, and worked fine on a variety of older and newer Macs.
The Boot Camp support software itself, now version 4.0, seems largely to be a driver update, and a pretty minor one at that - support for multitouch in Windows remains as basic as ever. Most notably, support for Windows XP has been completely removed - you may be able to get Vista working due to similar driver models, if you’re into it, but otherwise 32-bit or 64-bit Windows 7 is the way to go.
Also, I mentioned these things in the FileVault section but it can’t hurt to mention them again: while BootCamp can read standard HFS+ partitions, it can’t read FileVault-encrypted partitions, and since FileVault can only protect HFS+ volumes, any data stored on your Windows partition is unencrypted and easily accessible.
Migration assistant
As an advanced user, I generally prefer not to use OS X's built-in Migration Assistant to transfer files and programs from one Mac to another - I usually find that the program is actually too thorough in bringing over weird, old cruft from a longstanding OS install. To its credit, though, it does make it that much easier to get a new computer setup, especially for novice users. In Lion, the OS X version of the Migration Assistant app remains essentially unchanged from prior versions, so I want to focus mostly on the new Windows version of the tool.
Even though the Windows version of the Migration Assistant is new, in operation it is largely identical to the Mac version. You'll first need to install it on the Windows computer from which you'll be migrating - it's a small download from Apple, and takes just a few minutes to setup.
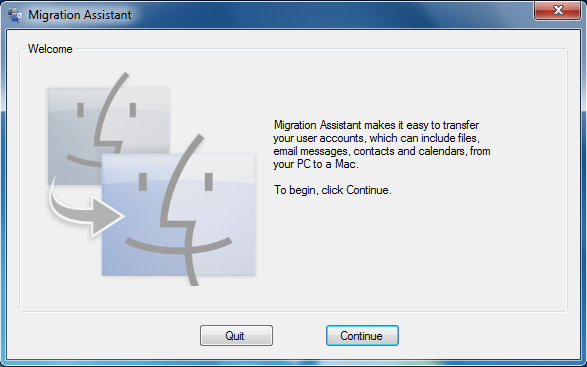
You'll need to make sure that both the Windows computer and your Mac are on the same network, since the Windows version of the Migration Assistant can only transfer files over a network. Once they're both connected, fire up the Migration Assistant on both machines. You'll have to click through a few screens and verify a confirmation number, and then you'll be asked what you want to bring over.
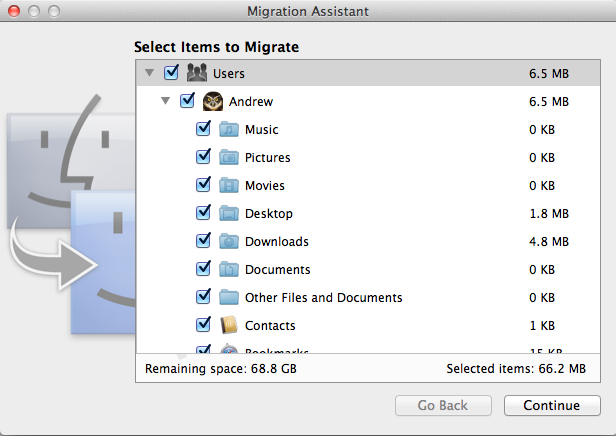
Of course, you won't be able to bring over any applications or system preferences, but because of underlying similarities in how user data is stored between Windows and OS X, it seems to work pretty well - the Migration Assistant will even attempt to find any non-standard files on the C: drive and try to move them over for you.
Once the data copies (which will take some time, depending on the speed of your network), you'll be asked to setup an account name - this will generally match whatever your Windows account name was, though you're free to rename things as you like.
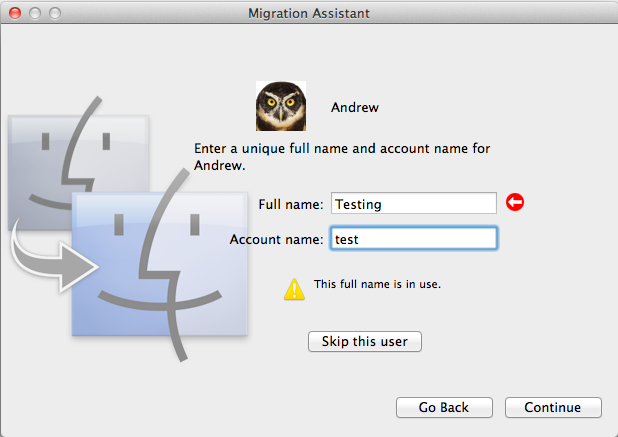
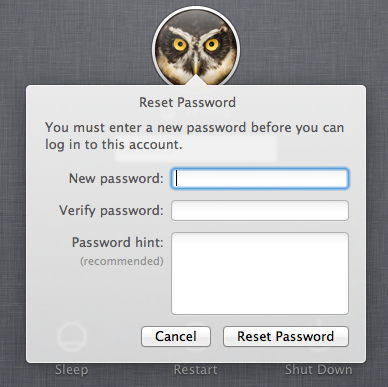
OS X will now create the account, and you'll be prompted to give it a password the next time you login.
And that's really all there is to it. The bar for Windows-to-Mac switchers has been set that much lower.
Lion is the first OS X release to drop support for any Intel processors – machines using 32-bit Core Solo and Core Duo machines (sold mostly in 2006 at the very beginning of the Intel switch) aren’t able to install the new OS without hacking (which is outside the scope of this review). This is common practice for Apple, whom habitually irks a small but vocal portion of its userbase who insist (not altogether unreasonably) that their Macs are still running just fine.
Apple usually doesn’t do this lightly – in most cases, dropping support for older models is done to move the platform forward (though, as when 10.4 dropped support for Macs without FireWire, it can also be done to push particular proprietary technology). Just as Snow Leopard pulled support for PowerPC Macs to emphasize Intel development, Lion will pull support for x86 to push 64-bit development.
I’ve seen quite a bit of confusion on this topic (and there was quite a bit when Snow Leopard trumpeted full 64-bit support at its release), so I want to go into some detail about the history of 64-bit OS X. If you’re not interested in that, though, let me lay out the most important stuff in brief:
- Core Solo and Core Duo-equipped Macs are the only Intel Macs being dropped by Lion. Even if it can’t boot the 64-bit kernel of Lion or support 64-bit EFI, any Mac that came with a Core 2 Duo (or any 64-bit capable Intel processor) can install and run Lion without modification.
- Core 2 Duo-equipped Macs that don’t support OS X’s 64-bit kernel or 64-bit EFI can still run 64-bit apps, which can address more than 4GB of RAM.
- The Lion installer isn’t actually doing checks for processor capability, but for your Mac’s model identifier, meaning that Core Solo and Core Duo Mac Minis and iMacs that were later upgraded to Core 2 Duo processors will still fail to install Lion without modification because the installer assumes they’ll be running 32-bit processors (though if you can get Lion running, your processor should be able to run everything just fine). Remember that these processor upgrades, while technically possible, were never supported by Apple.
Now for a history lesson, combined with about as much information about Lion’s 64-bit support as you could ever want.
64-bit in Mac OS X
OS X’s 64-bit implementation differs significantly from that of Windows, which treats its 32-bit and 64-bit versions as two distinct operating systems stored on different install media. This is done mostly to maintain Windows’ compatibility with older applications – moving or renaming things like the System32 folder would break programs that expected it to be there – and as a result the two are separated to the point that there isn’t even an upgrade path between 32-bit Windows and 64-bit Windows. Because of this, and because Windows applications and drivers usually have distinct 32-bit and 64-bit versions, Windows’ transition to 64-bit has been slightly rockier and slightly more visible to the user.
OS X, on the other hand, has made a more gradual transition between 32-bit and 64-bit, with support added slowly over the course of multiple releases. OS X 10.3 and 10.4 came with some basic support for 64-bit underpinnings, but support for 64-bit applications didn’t come until 10.5 Leopard (which included the 64-bit version of Cocoa, OS X’s primary API). The same technology that allowed developers to offer Intel and PowerPC programs as a single Universal Binary also allows developers to release single packages that support both the x86 and x64 architectures.
While Leopard brought support for 64-bit apps that can address more than 4GB of memory, Snow Leopard actually introduced an OS kernel (along with 64-bit kernel extensions and drivers) that was 64-bit, though a 32-bit kernel was used by default on almost all Macs whether they supported the 64-bit kernel or not. This was done mostly to give software developers time to get 64-bit KEXTs and drivers ready – since Snow Leopard’s release, Apple has released both Mac Pros and MacBook Pros that boot with the 64-bit kernel by default (and OS X Server uses a 64-bit kernel by default in even more models, as outlined in this Apple support document).
Lion pushes this a bit further by booting a 64-bit kernel on basically any Mac that supports it – the 2007 aluminum iMac, the 2009 unibody MacBook Pro, and the 2010 MacBook Air I used booted Snow Leopard with the 32-bit kernel by default, but booted with the 64-bit kernel for Lion (and the iMac and the Air didn't even support the 64-bit kernel in Snow Leopard). That being said, Lion still includes the 32-bit OS X kernel, and will use it on machines that don’t support the 64-bit kernel – you can still make full use of 64-bit apps and more than 4GB of RAM, even though the OS kernel itself can’t. This won't usually be a big deal, since the Macs that can’t use the 64-bit kernel are mostly older models with RAM caps at or under 4GB anyway.
In both Snow Leopard and Lion, you can check your kernel's 64-bitness by opening up System Profiler/Information, going to the Software section, and looking at the "64-bit Kernel and Extensions" field. Yes means a 64-bit kernel, No means 32-bit.
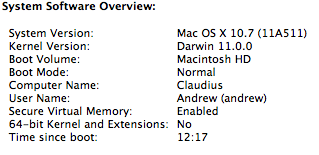
Lion with a 32-bit kernel on a 2008 MacBook
Support for the 64-bit kernel requires four things to be true: You need (obviously) a 64-bit Intel processor, a Mac that supports 64-bit EFI, hardware for which OS X has 64-bit drivers (graphics cards are usually the problematic area here), and a Mac that has not been specifically disallowed from booting the 64-bit kernel – most new Macs support the 64-bit kernel, but white MacBooks are still artificially limited by Apple from booting the 64-bit kernel in Snow Leopard despite hardware that fully supports it. Most if not all of these artificial limitations have been removed in Lion for machines that meet the other 64-bit criteria.
Apple began really pushing 64-bit with its marketing for Snow Leopard, and has been dropping support for 32-bit APIs like Carbon for years – giving developers aiming for Lion guaranteed 64-bit capability both enables them to better take advantage of the architecture improvements and saves them the effort (and file size) of also supporting a 32-bit version. That said, 32-bit programs will continue to run fine in Lion, just as they ran fine in Snow Leopard and Leopard before it.
The hidden downside of the 64-bit push for Core Solo and Core Duo users is that, as developers slowly move to 64-bit only applications, we’ll start getting more and more things that won’t run on 32-bit Snow Leopard despite being supported on 64-bit Snow Leopard (the same thing is currently happening to Leopard users still using PowerPC processors – Flash Player, Google Chrome, Firefox 4, and Microsoft Office 2011 are all fairly mainstream apps that run in Leopard but only on Intel machines). The disappearance of 32-bit programs will be gradual, but it is something to be wary of if you continue to use a Core Solo or Core Duo Mac going forward.
What gets dropped next?
This discussion isn’t complete without a look into our murky crystal ball to see what Macs will be dropped by the next version of Mac OS. The continued push for 64-bit makes me think that we could see machines incapable of running the 64-bit kernel dropped, though that line in the sand could be too faint for most consumers to see, especially given the scarce and not-always-clear documentation on what Macs support it in the first place.
It’s worth noting that Apple could easily issue EFI, KEXT, and driver updates for any Macs it wants to enable to run the 64-bit kernel – there are some models like the 2007 aluminum iMac (iMac 7,1, for those who prefer information pulled from System Profiler) that didn’t support Snow Leopard’s 64-bit kernel, but boot with Lion’s 64-bit kernel by default.
The more likely cutoff point for 10.8 (or OS XI, or whatever comes next) is graphics-related – Apple has been shipping mostly OpenCL-capable products since 2009, and by the time the next Mac OS is upon us (2013-ish, at the current rate), products pre-dating OpenCL support will mostly be four and five years old (roughly the same age as the current Core Solo/Duo Macs). If Apple continues its trend of dropping products that hold back the platform in one way or another, pre-OpenCL machines seem to be the most likely candidates on the chopping block.
Apple has historically used Samba, an open-source implementation of the SMB file sharing protocol, to share files with Windows machines. First included in OS X 10.2, Samba also enabled Macs to both join and host Windows-compatible directory servers, increasing the then-fledgling OS’s viability in a business setting. However, the Samba team recently began licensing the software under the GPL3 license, which prohibits its inclusion in retail products, and rather than lose these key interoperability features, Apple chose to develop its own in-house implementation for Lion. What does that mean for you, the user?
Well, for starters, Lion’s new SMB implementation is SMB 2.0 only - this is a Microsoft-developed improvement of the specification that was introduced in Windows Vista and continued in Windows 7. This has one major ramifications for Lion users, and I suspect it will only impact a fraction of a fraction of them: Lion computers can no longer be joined to NT Domain Controller directories. These directories are quite old at this point - their successor, Active Directory, came with Windows Server 2000 in 1999, and has become much more robust with each Windows Server release since - but if, for some reason, you or your business uses new or newish Macs on an ancient domain, Lion’s going to break things for you (Lion does, however, remain compatible with Active Directory).
You never want to see an OS lose features, but I can’t say I blame Apple much for making this call, and it’s not a secret that Apple has historically been much less interested in backward compatibility than Microsoft. For people who absolutely need for OS X to have this functionality, Samba is definitely still around, and I wouldn’t be surprised to see someone begin maintaining an OS X-friendly fork of the software. Just know Lion won’t do it out of the box anymore.
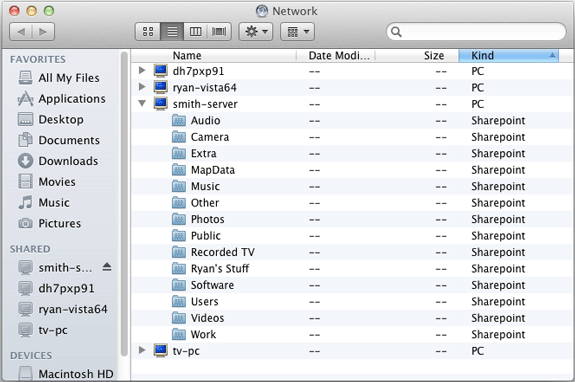
SMB’s main use in OS X is for file sharing with Windows users, though, and I can say that file sharing with users of both Windows XP and Windows 7 (and, by extension, Windows Vista, for what it’s worth) works just fine once you set it up in System Preferences. I was able to copy files to and from a basic share I made without issue.
Anecdotally, I can also say that connecting to and browsing through an SMB share with many files and folders feels faster than Snow Leopard does on the same system connected to the same share. In Snow Leopard, I’d often have to wait for folders with a lot of data in them to populate - in Lion, things are more or less instantaneous. SMB2 was optimized to improve speed over high-latency connections, and I’m sure that accounts for at least some of the increased snappiness.
Performance: Similar to Snow Leopard
Benchmarking Macs is a lot like benchmarking smartphones: there's a huge user experience component and not enough tools to really do a thorough job of evaluating performance. The majority of our OS X benchmarks involve patience and a stop watch and we've redone the whole suite in anticipation of Lion.
Generally speaking, performance under Lion hasn't changed all that much since Snow Leopard. Earlier beta releases of the OS were significantly slower than Snow Leopard, but the final code appears to perform on par with SL regardless of microprocessor architecture.
We tested Lion on two platforms. A brand new Core i7 15-inch MacBook Pro and a much older Penryn Core 2 Duo 15-inch MacBook Pro. We measured performance across a number of applications as well as battery life.
The graph below shows the 2011 MacBook Pro and how its performance fares under both OS X 10.6.8 and 10.7.0. As you can see for the most part performance really remains unchanged:

There were a couple of tests that showed more than a 10% increase in performance (possibly a reflection of Lion's upgrade to OpenGL 3.2 from 10.6's not-quite-3.0) but generally Lion performs no differently than Snow Leopard regardless of the nature of the benchmark. GPU performance also remained mostly unchanged as you can see by the Portal 2 numbers, although the Cinebench 11.5 OpenGL test did go up a bit.
The situation isn't really any different on the older Core 2 Duo MacBook Pro either:
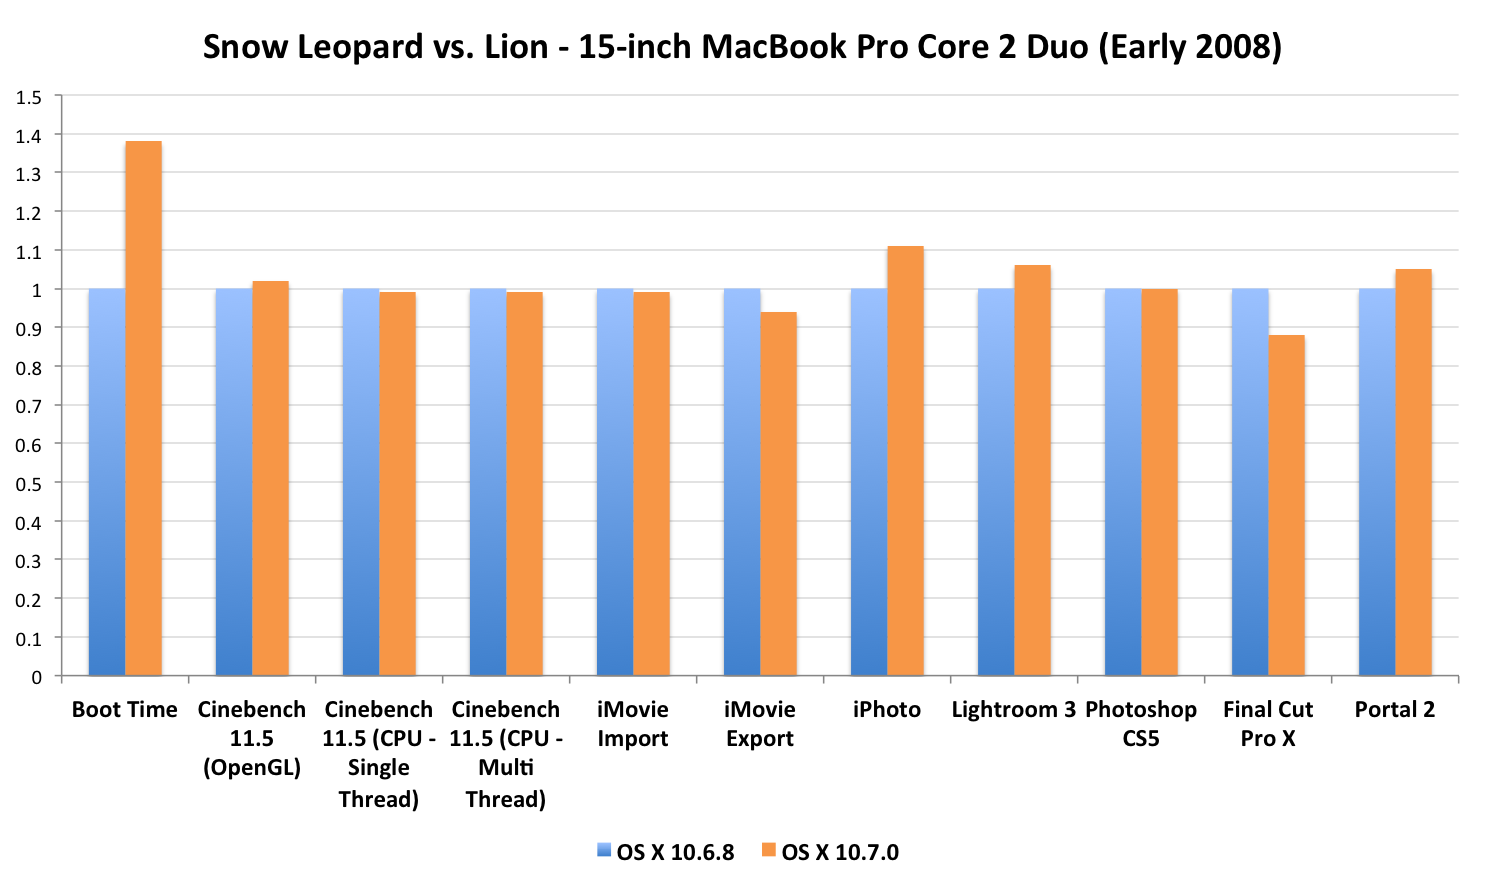
Boot time skyrocketed for some reason (perhaps an artifact of the Lion upgrade on a system with a standard HDD instead of an SSD) but otherwise performance remained mostly unchanged.
Only our iPhoto test showed a greater than 10% increase in performance. Everything else either dropped slightly, stayed the same or showed a small increase in performance.
The seat of the pants feel while using Lion echoes our performance results. While some UI animations seem sped up, most tasks don't feel any quicker under OS X 10.7. Some of the new features under Lion do feel like they require a good amount of processing power. Take the new threaded view in Mail for example. My personal machine is a 2011 MacBook Pro with a 2.3GHz Core i7 and an SSD. Once you get over a dozen replies in a thread just loading the thread easily eats up 50% of one of my Core i7 cores.
What about longer threads? Take a look at what happened when I viewed an email thread with 65 replies in my Inbox:
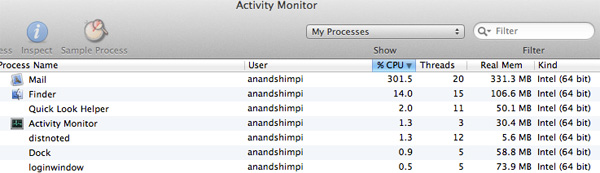
Three cores at 100% just to load the thread. Note that the loading process took a few seconds, dropping down to only 100% CPU utilization before finally completing the load.
Battery Life

Battery life on the Sandy Bridge MacBook Pro improved in our two lighter workload tests by 5%, however under heavy load there was no change. Given that we only saw improvements in our two workloads with built in idle time I suspect Lion may have tweaked some power management settings vs. Snow Leopard, but nothing more. The improvements here might be limited to newer architectures or systems with Apple SSDs however, because they definitely weren't echoed on our older MacBook Pro:
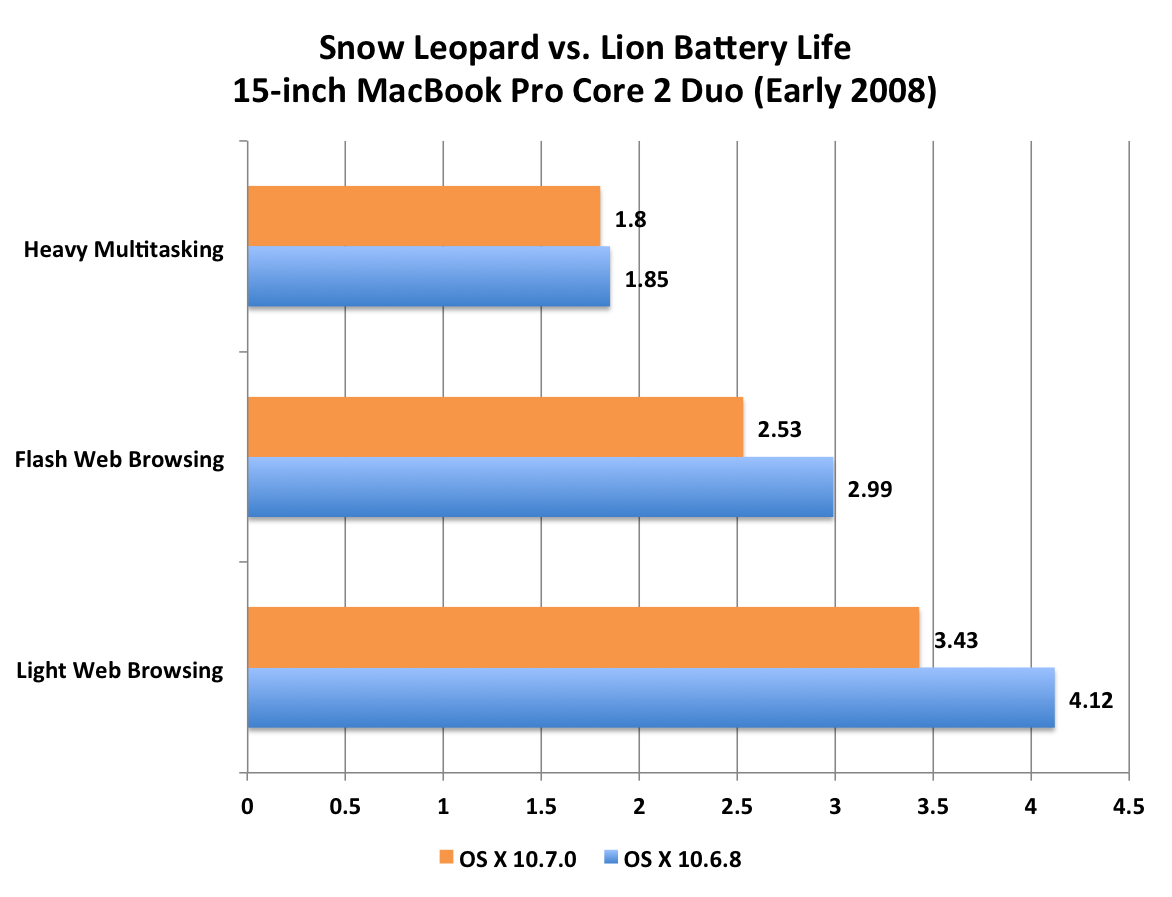
The early 2008 MacBook Pro showed around a 20% decrease in battery life in our two web browsing battery life tests. Once again we saw no difference in our heavy multitasking test. Once again I'm guessing this change is due to some tinkering with OS X's behavior at idle. Our performance data above doesn't suggest any performance issues causing lower battery life on the old Core 2 Duo based MacBook Pro, so there's got to be something keeping the CPU out of its lower idle states during our tests. I checked Activity Monitor during the benchmarks and didn't see anything obvious, meaning it's likely a lower level OS issue. Our own Brian Klug theorized that the lower battery life could be due to the Core 2 Duo MacBook Pro now loading Lion's 64-bit kernel by default instead of the 32-bit kernel like it did in the Snow Leopard days.
The impact is pretty significant on the older MacBook Pro. Older mobile Mac owners dependent on battery life may want to wait to pull the trigger on Lion until at least the first point update.
I will add that something very strange happened on one of our battery life runs with the 2011 MacBook Pro. During our Flash Web Browsing battery life test we recorded a full battery rundown that took under 3 hours, instead of the ~7 hours you see above. Once again I checked Activity Monitor to ensure nothing funny was going on and didn't find anything odd. Subsequent runs couldn't duplicate the result either. It's pretty unusual for us to see that sort of run-to-run variation in our tests so it's not totally clear what happened there, other than Lion does seem to be doing more in the background which could impact battery life than previous iterations of OS X.
For those of you worried that Apple's "back to the Mac" marketing push would result in an OS X version that sacrifices functionality in favor of imported iOS features and reduced capability: those fears are, by and large, unfounded. The iOS-inspired functionality is mostly laid over top of a foundation that's more or less OS X as it has been since Leopard - a solid, mature and full-featured desktop operating system.
That said, the usefulness of individual Lion features will likely come down to your individual needs and work patterns. Most should appreciate solid new features like Versions, the new Mail, and the much-needed enhancements to FileVault, but features like Launchpad and the UI overhauls of iCal and Address Book are of dubious benefit to users, and other heavily-promoted features like multitouch gestures and the Mac App Store are already available to Snow Leopard users.
Even so, at $29, there is really no reason not to buy Lion unless you really need Rosetta support (though generally speaking, unless you absolutely need a Lion-only feature, it'd be wise to wait until 10.7.1 or 10.7.2 to make the jump, just in case), and this $29 expense covers every Mac associated with your Apple ID. The price makes Lion a real bargain - full OS X updates have typically cost $129, and Family Pack licenses for five Macs used to cost $149. Business customers can get Lion for $29.99 per copy in units of 20 or more, and educational institutions can buy it along with the latest iLife and iWork upgrades for $39 in quantities of 25 or higher. Especially when compared to Microsoft's complicated and expensive Windows licensing, these simple, low and clearly defined upgrade prices are extremely welcome.
The real question is - what comes next? With OS X picking up some iOS features and iOS 5 promising to become almost entirely independent of our computers, many predict a future where the two operating systems eventually merge into one, and this doesn't seem entirely unlikely (though I suspect we'll hear about new hardware made for this purpose before we see software that does it).
The biggest question I have about OS X's future is whether the Mac App Store model will ever become the only way to install programs to your Mac, as it currently is on iOS. Such a system is not without its merits (users get a streamlined way to buy programs and a system protected from malware; Apple gets a healthy share of the profits), but for many, this would represent a fundamental (and, perhaps, intolerable) change to the operating system.
It's very hard to say whether this will happen - on the one hand, Apple seems to appreciate that different devices have different functions and needs, and that people expect to be able to install what they want, how they want on their computers. On the other hand, the App Store model has been very successful and lucrative for them, and the company has a history of throwing power users under the bus to appease the masses.
In either case, what we have here today is mostly a net gain, regardless of how you use your computer: existing functionality has been preserved (unless you use Rosetta), some useful new features have been added, and Lion runs as quickly on the same hardware as does Snow Leopard (unless you've got a Core Solo or Duo Mac, in which case it won't run at all). It's another incremental OS X upgrade, and like most OS X upgrades, it's fairly easy to recommend as long as your Mac and your programs support it.


